
Sealed bottom bracket refurbishment
You know the feeling – the crank starts to feel a bit wobbly or there’s nasty grinding / creaking noises from down there. Yes, your BB is telling you it needs attention.
Supposedly, you ‘can’t service’ sealed BB square taper units, they’re throwaway / replace items. I’m here to tell you that if you have the right bearings, tools and some time, it can be done – if the cups are ok and the centre tube isn’t rusted away, it’s worth the effort. There are some exceptions like the Shimano one piece units, these are not serviceable.
You’ll need a good vice with some jaw protectors to avoid damaging the thread on the cup, a hammer, new bearings, some good quality grease (I use TF2 Ultimate just ‘cos it’s a nice colour and doesn’t smell as bad as some greases) and a bit of tube or a deep socket that just fits over the spindle (we’ll come to that later). You’ll also need new bearings – the 2 common sizes for these BB units are 163110 or 173110 (for spindle diameter 16mm or 17mm). If you know where to look they can be obtained at a reasonable price. Or you can buy them from me 😉
Don’t be afraid to be quite brutal with these – what’s the worst that can happen? If you damage it, so what? You were going to throw it away anyway!
Procedure is as follows (refer to photos):
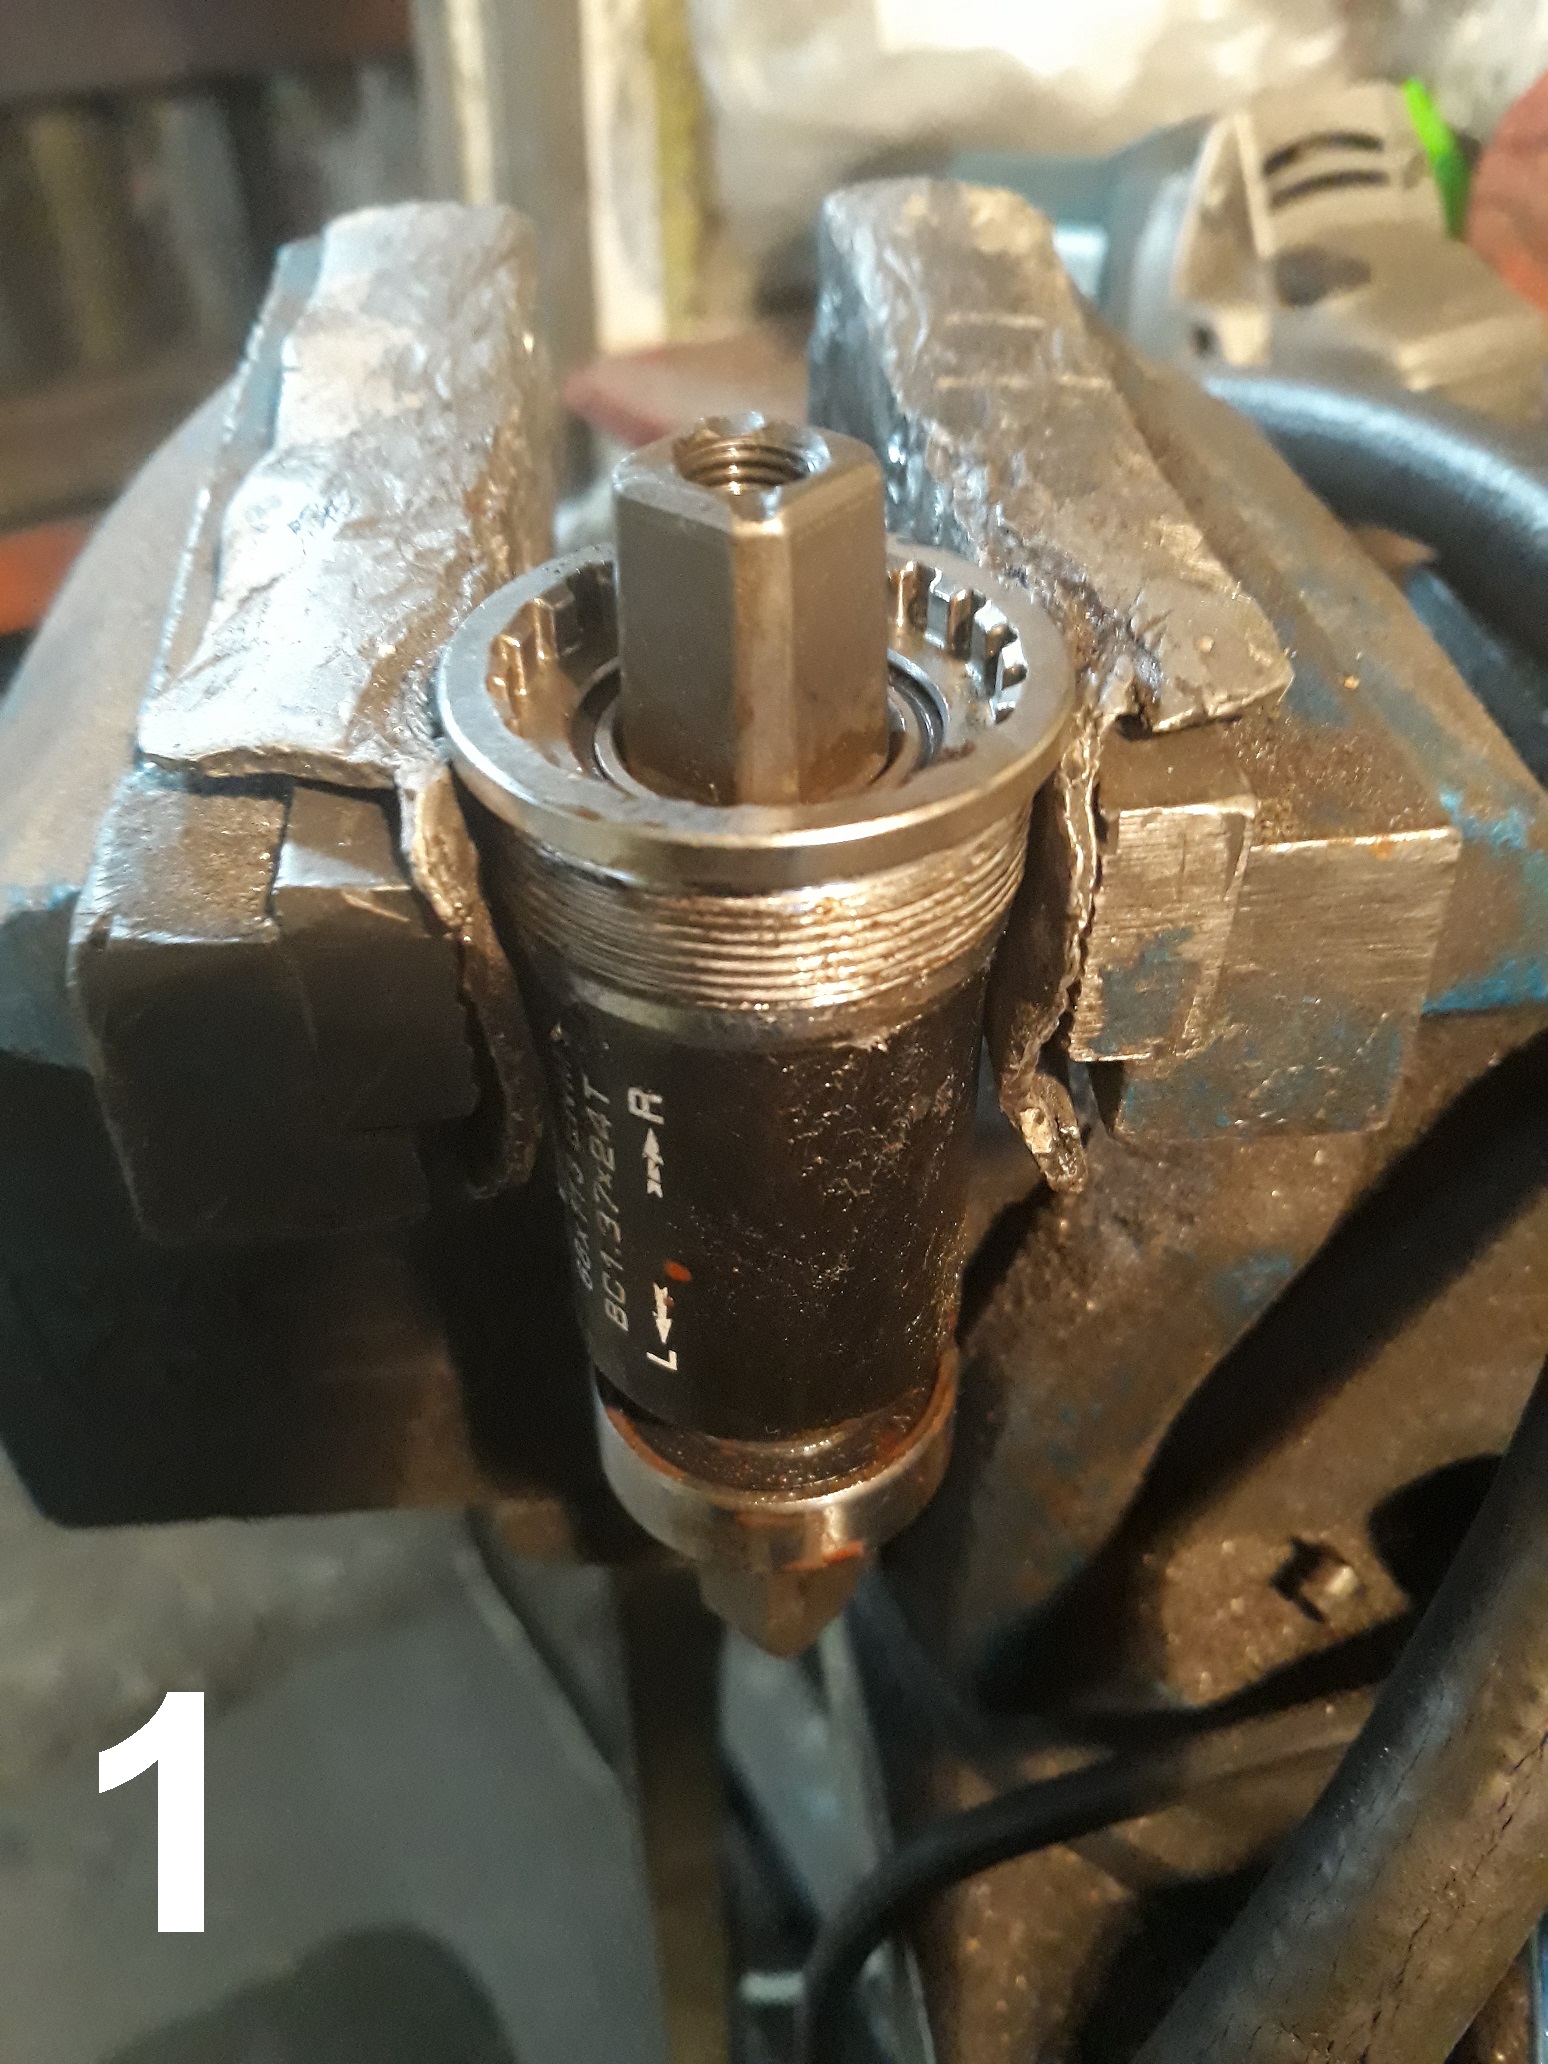
Photo 1 – place the BB in a vice (using jaw protectors, mine are aluminium but any soft metal is ok) with the lip of the BB cup resting on the top and just tighten the vice lightly to hold the BB in place. Make sure that the bottom part of the BB is clear underneath so it can drop through. Now whack the top end of the spindle – it may take more than one blow, but the spindle should drive out of the drive side bearing. Note which way round the spindle came out of the BB – there are often markings on the centre part to make this easy to identify.
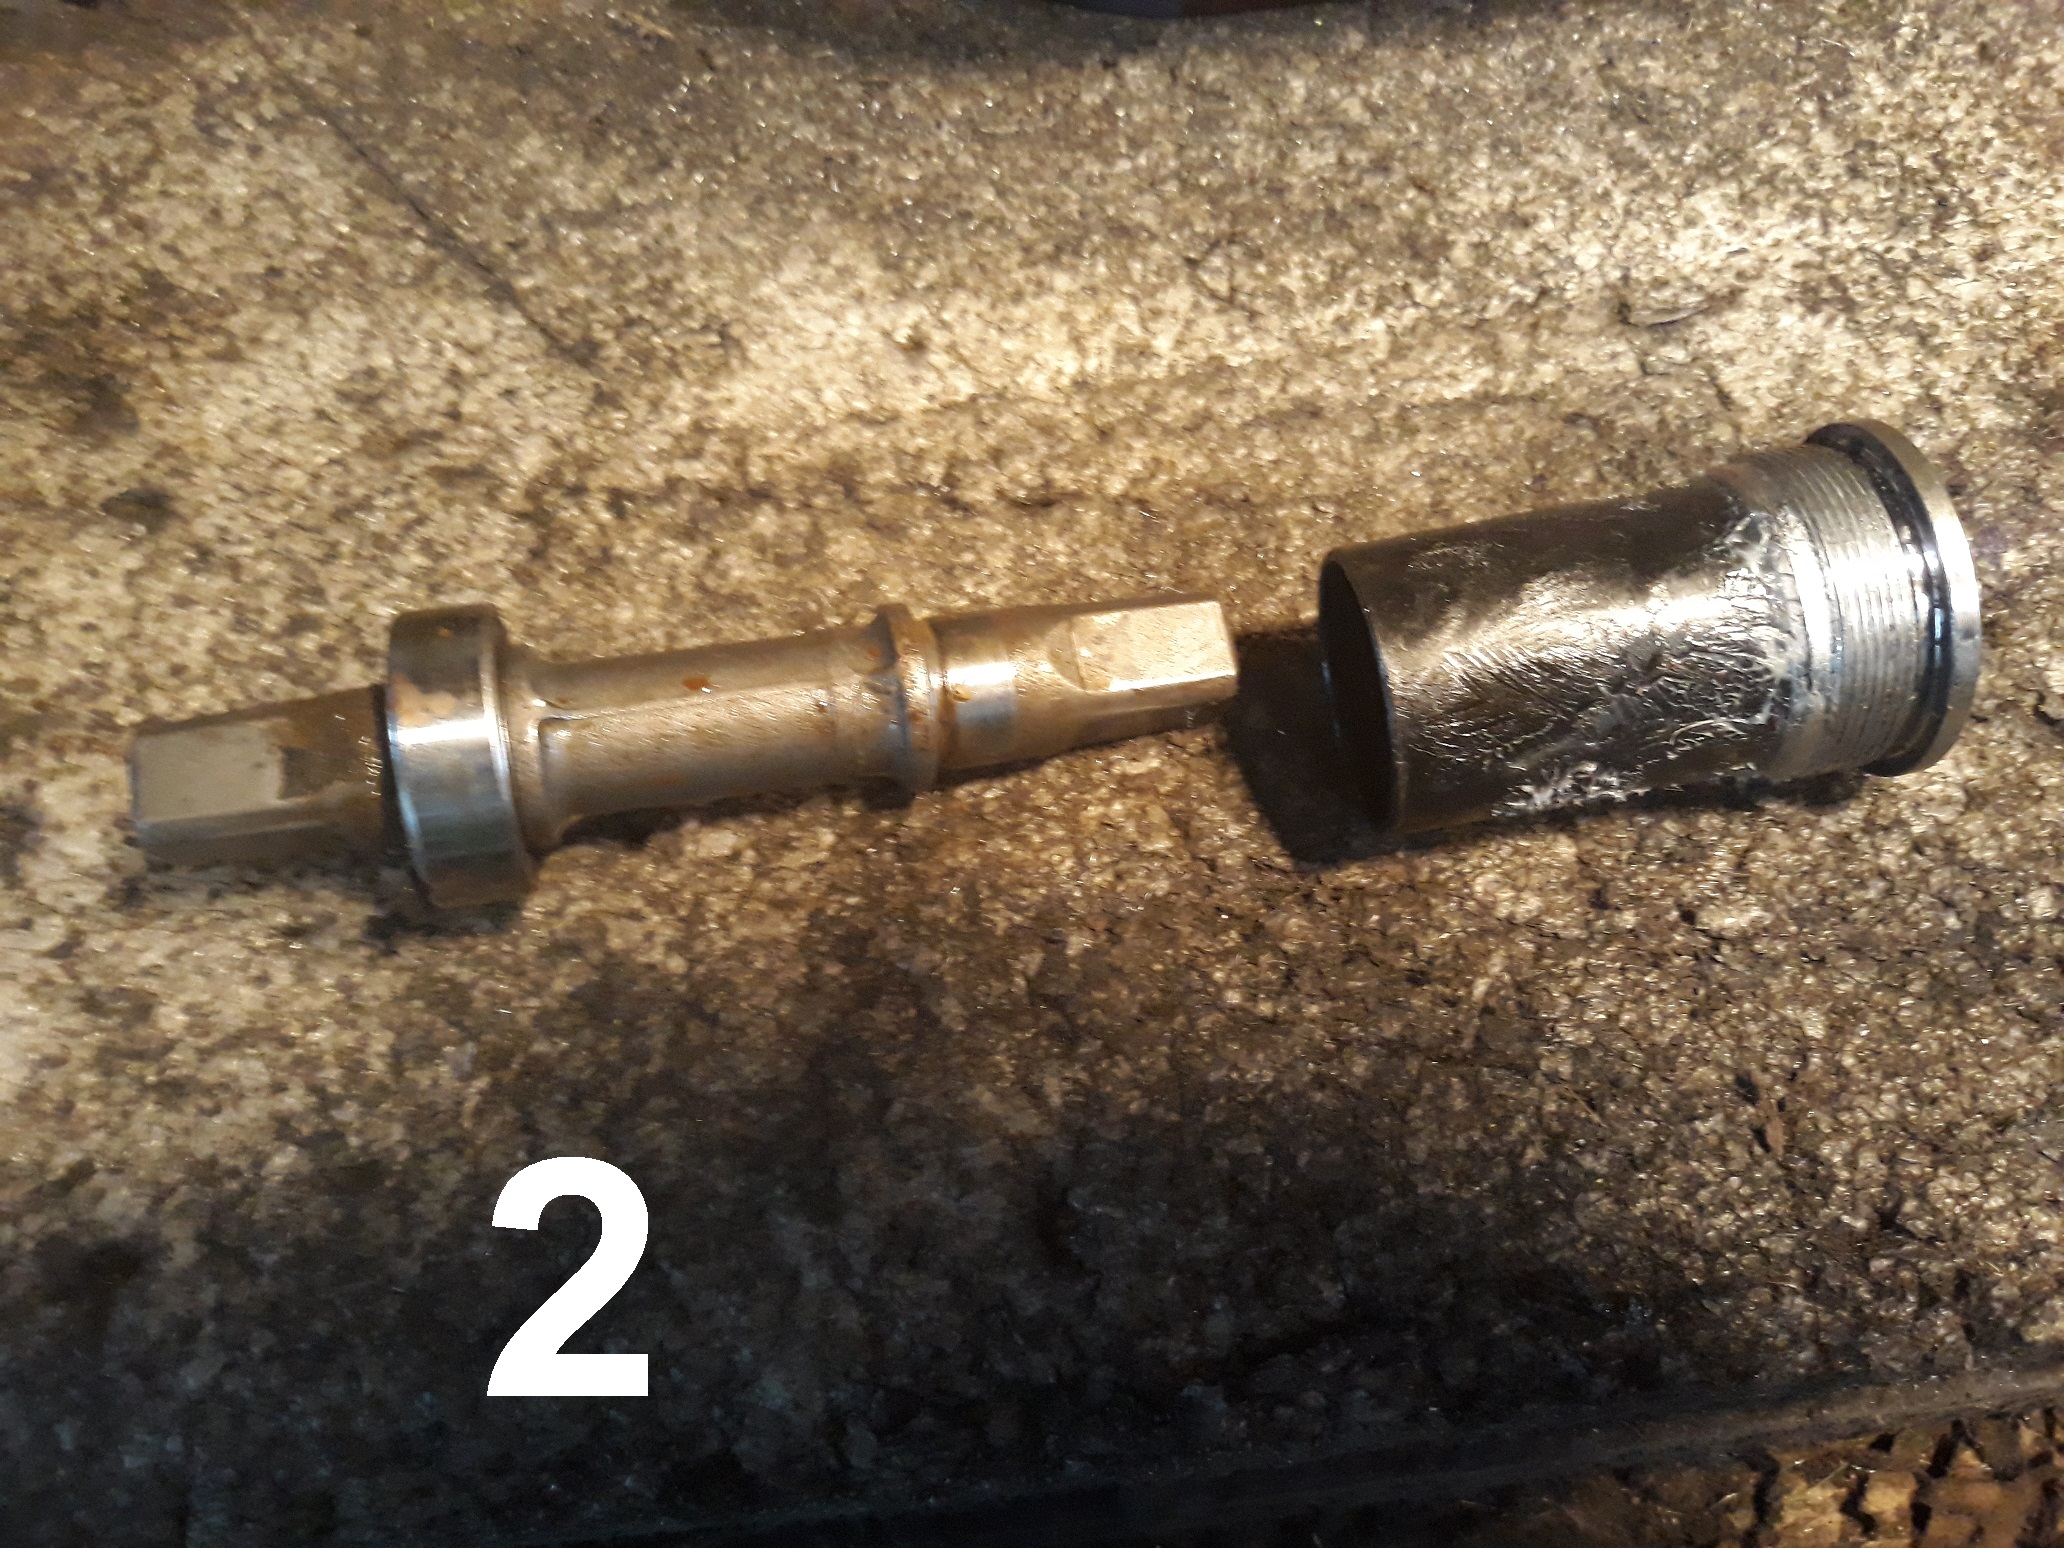
Photo 2 – You should end up with 2 pieces now – the spindle with the non drive side bearing attached, and the drive side cup with bearing inside and centre tube attached.
Photo 3 – Put the spindle in the vice with the non drive side bearing resting on the top, the whack the end of the spindle to drive it out of the bearing.
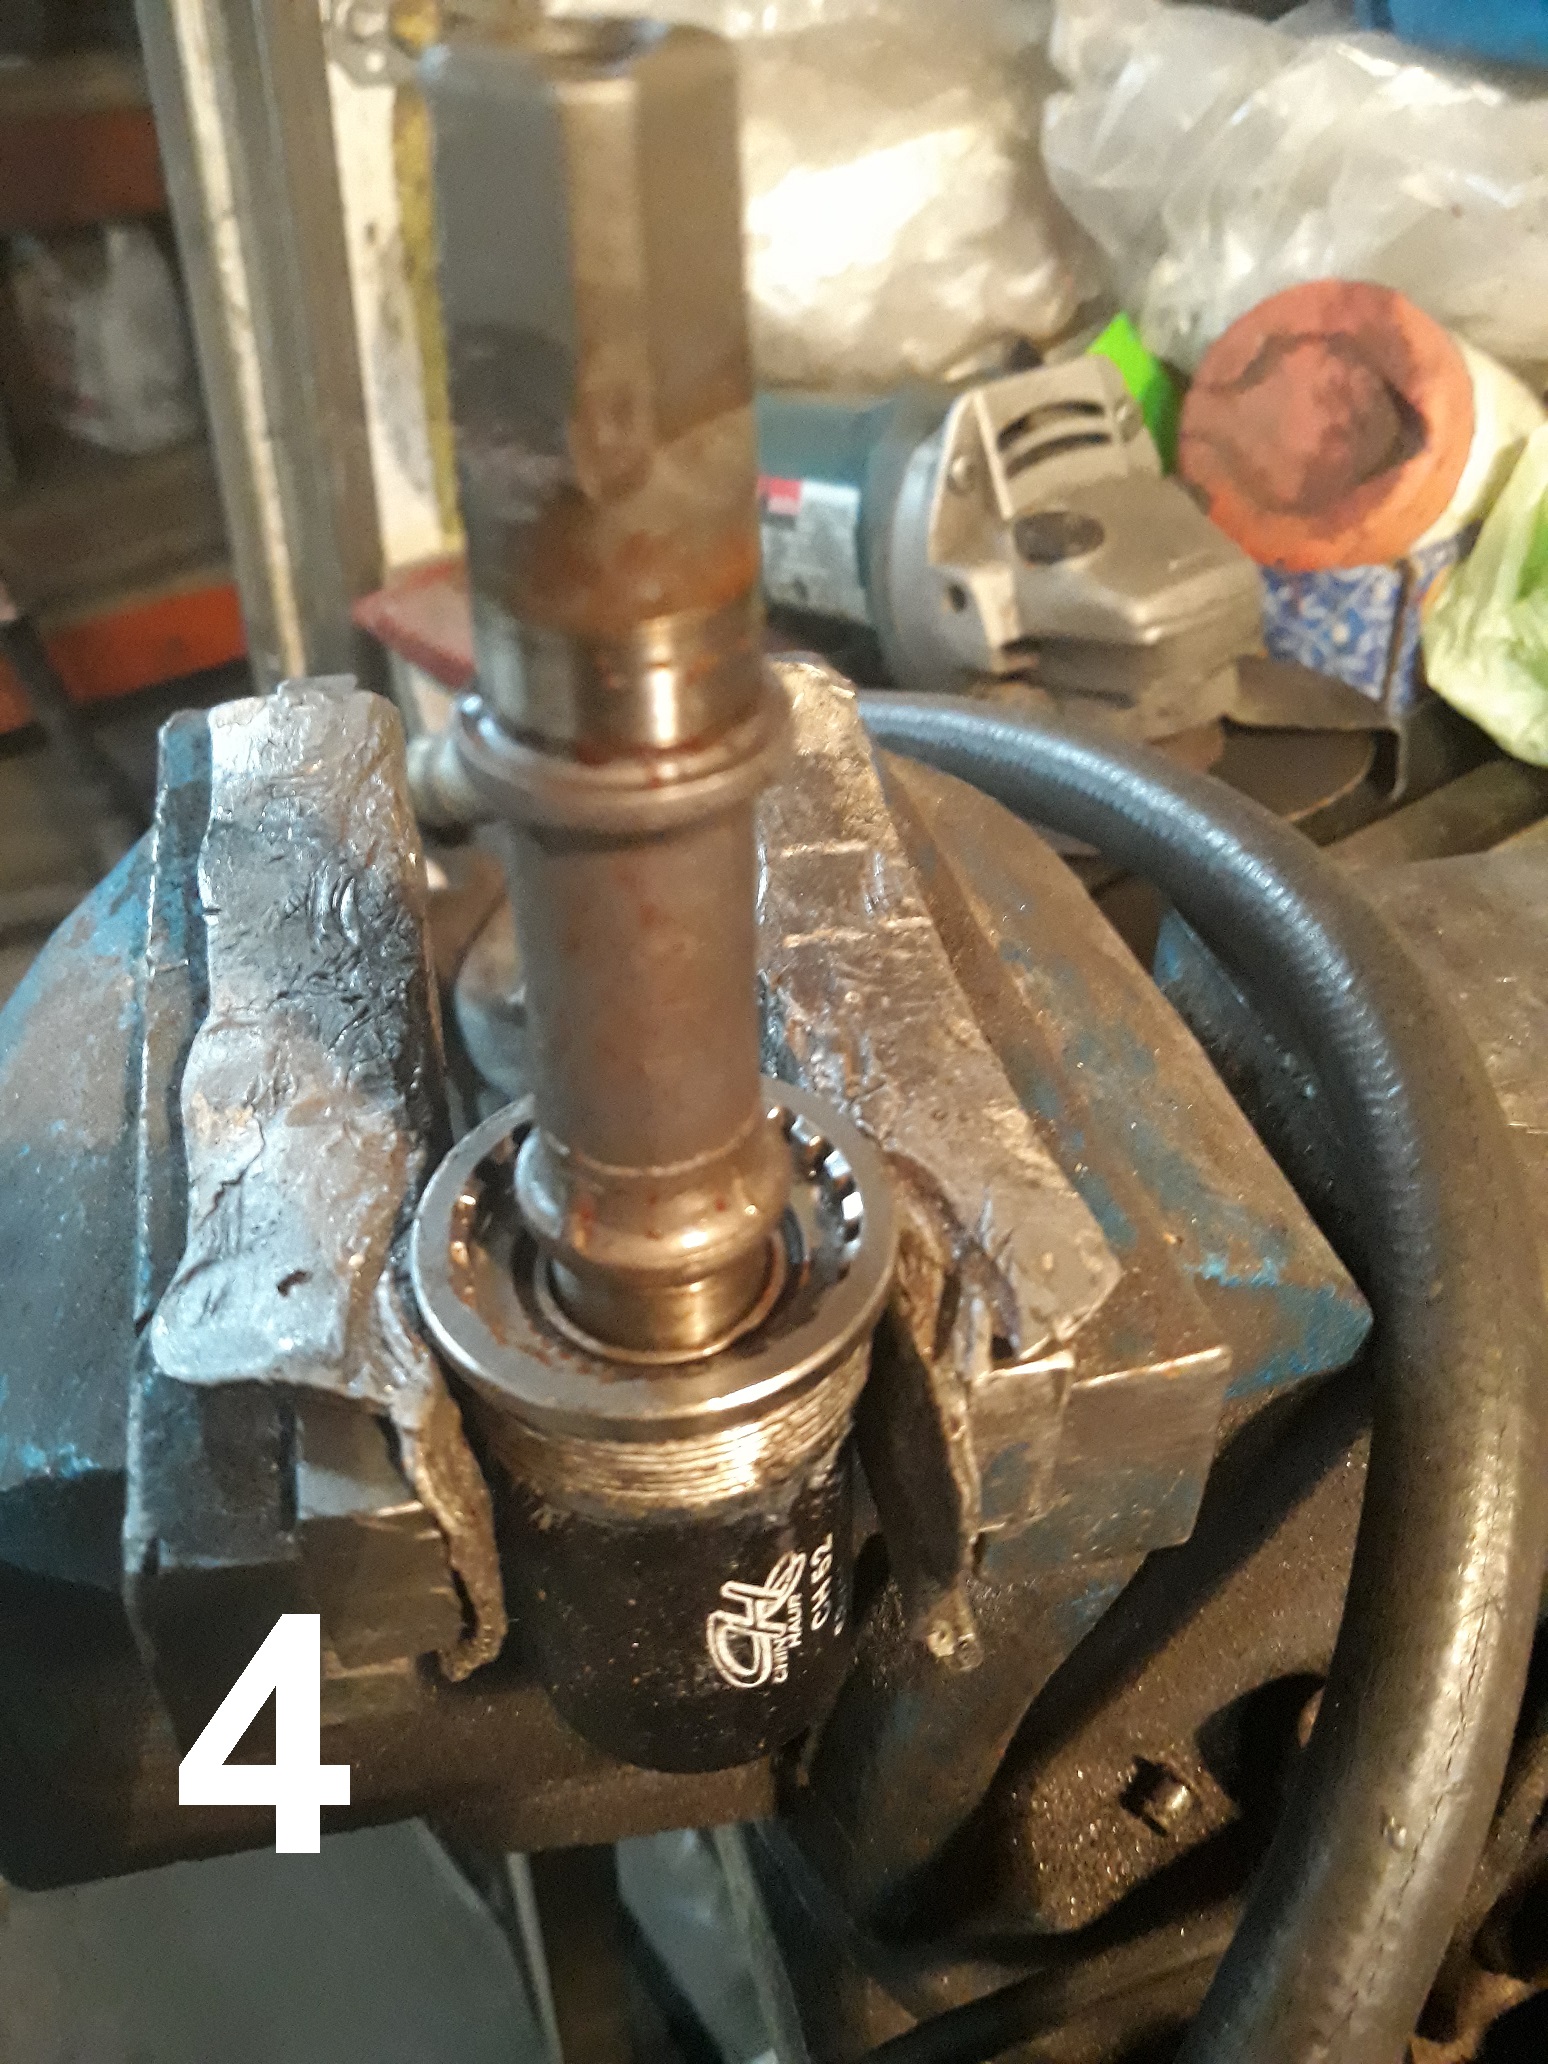
Photo 4 – You can now use the spindle to drive the bearing out of the drive side cup – put the cup back in the vice as in photo, then use either end of the spindle to drive the bearing out. The centre tube will also fall out. You can then remove that bearing from the spindle as in photo 3.
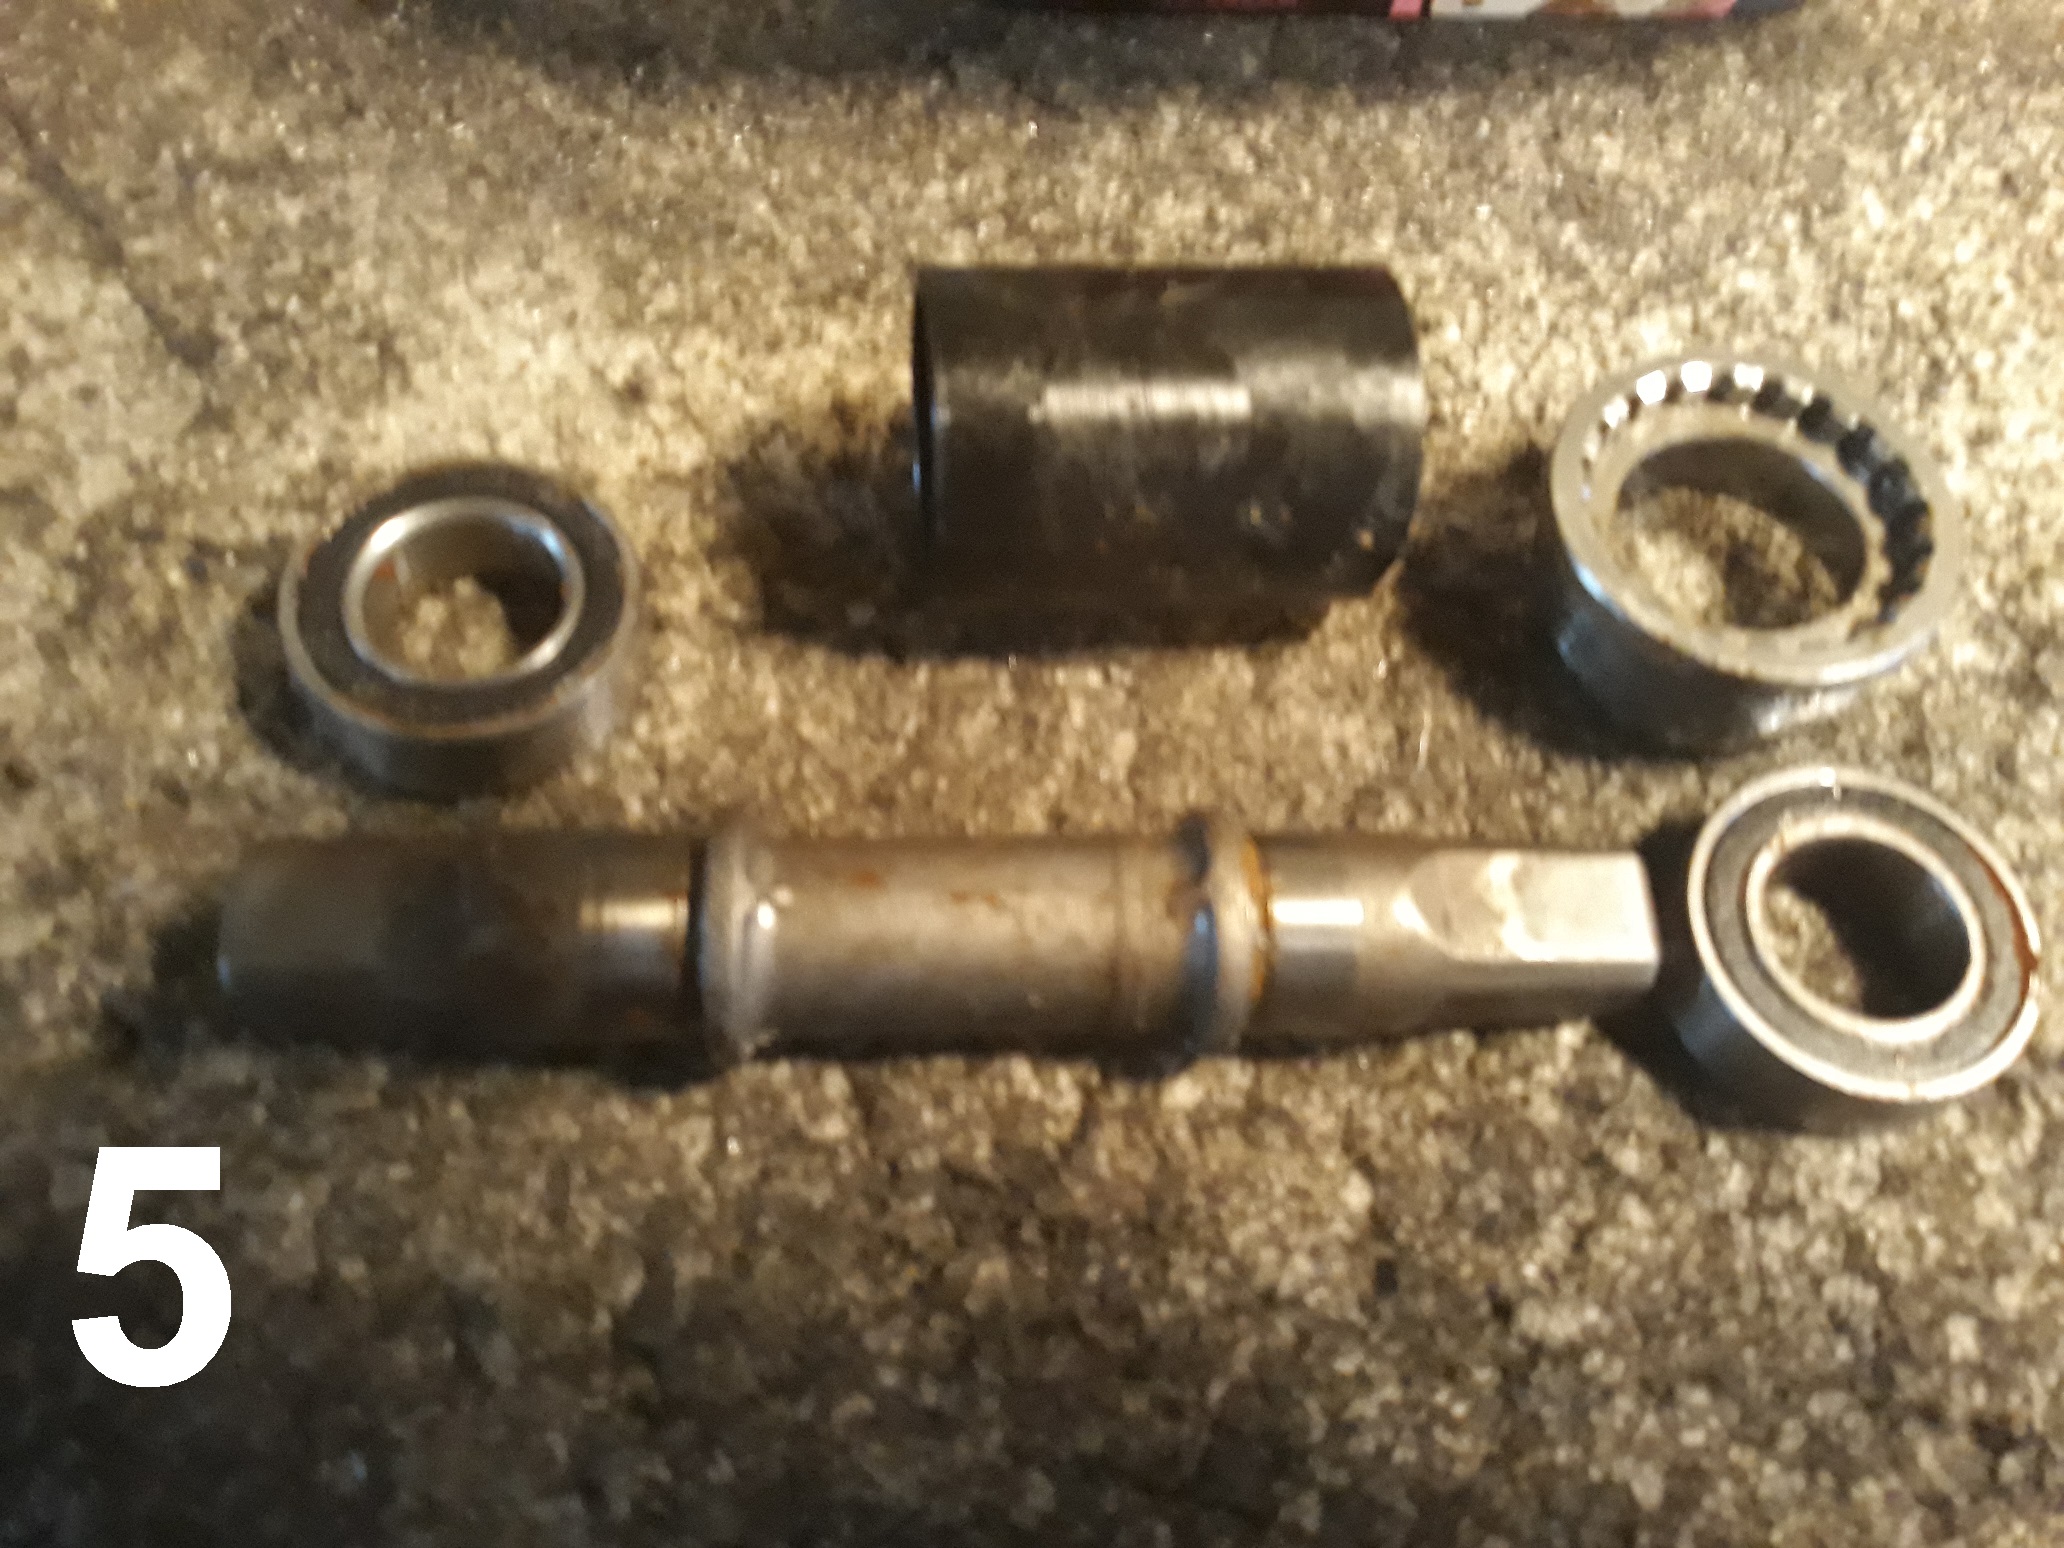
Photo 5 – This is how it looks when all apart.
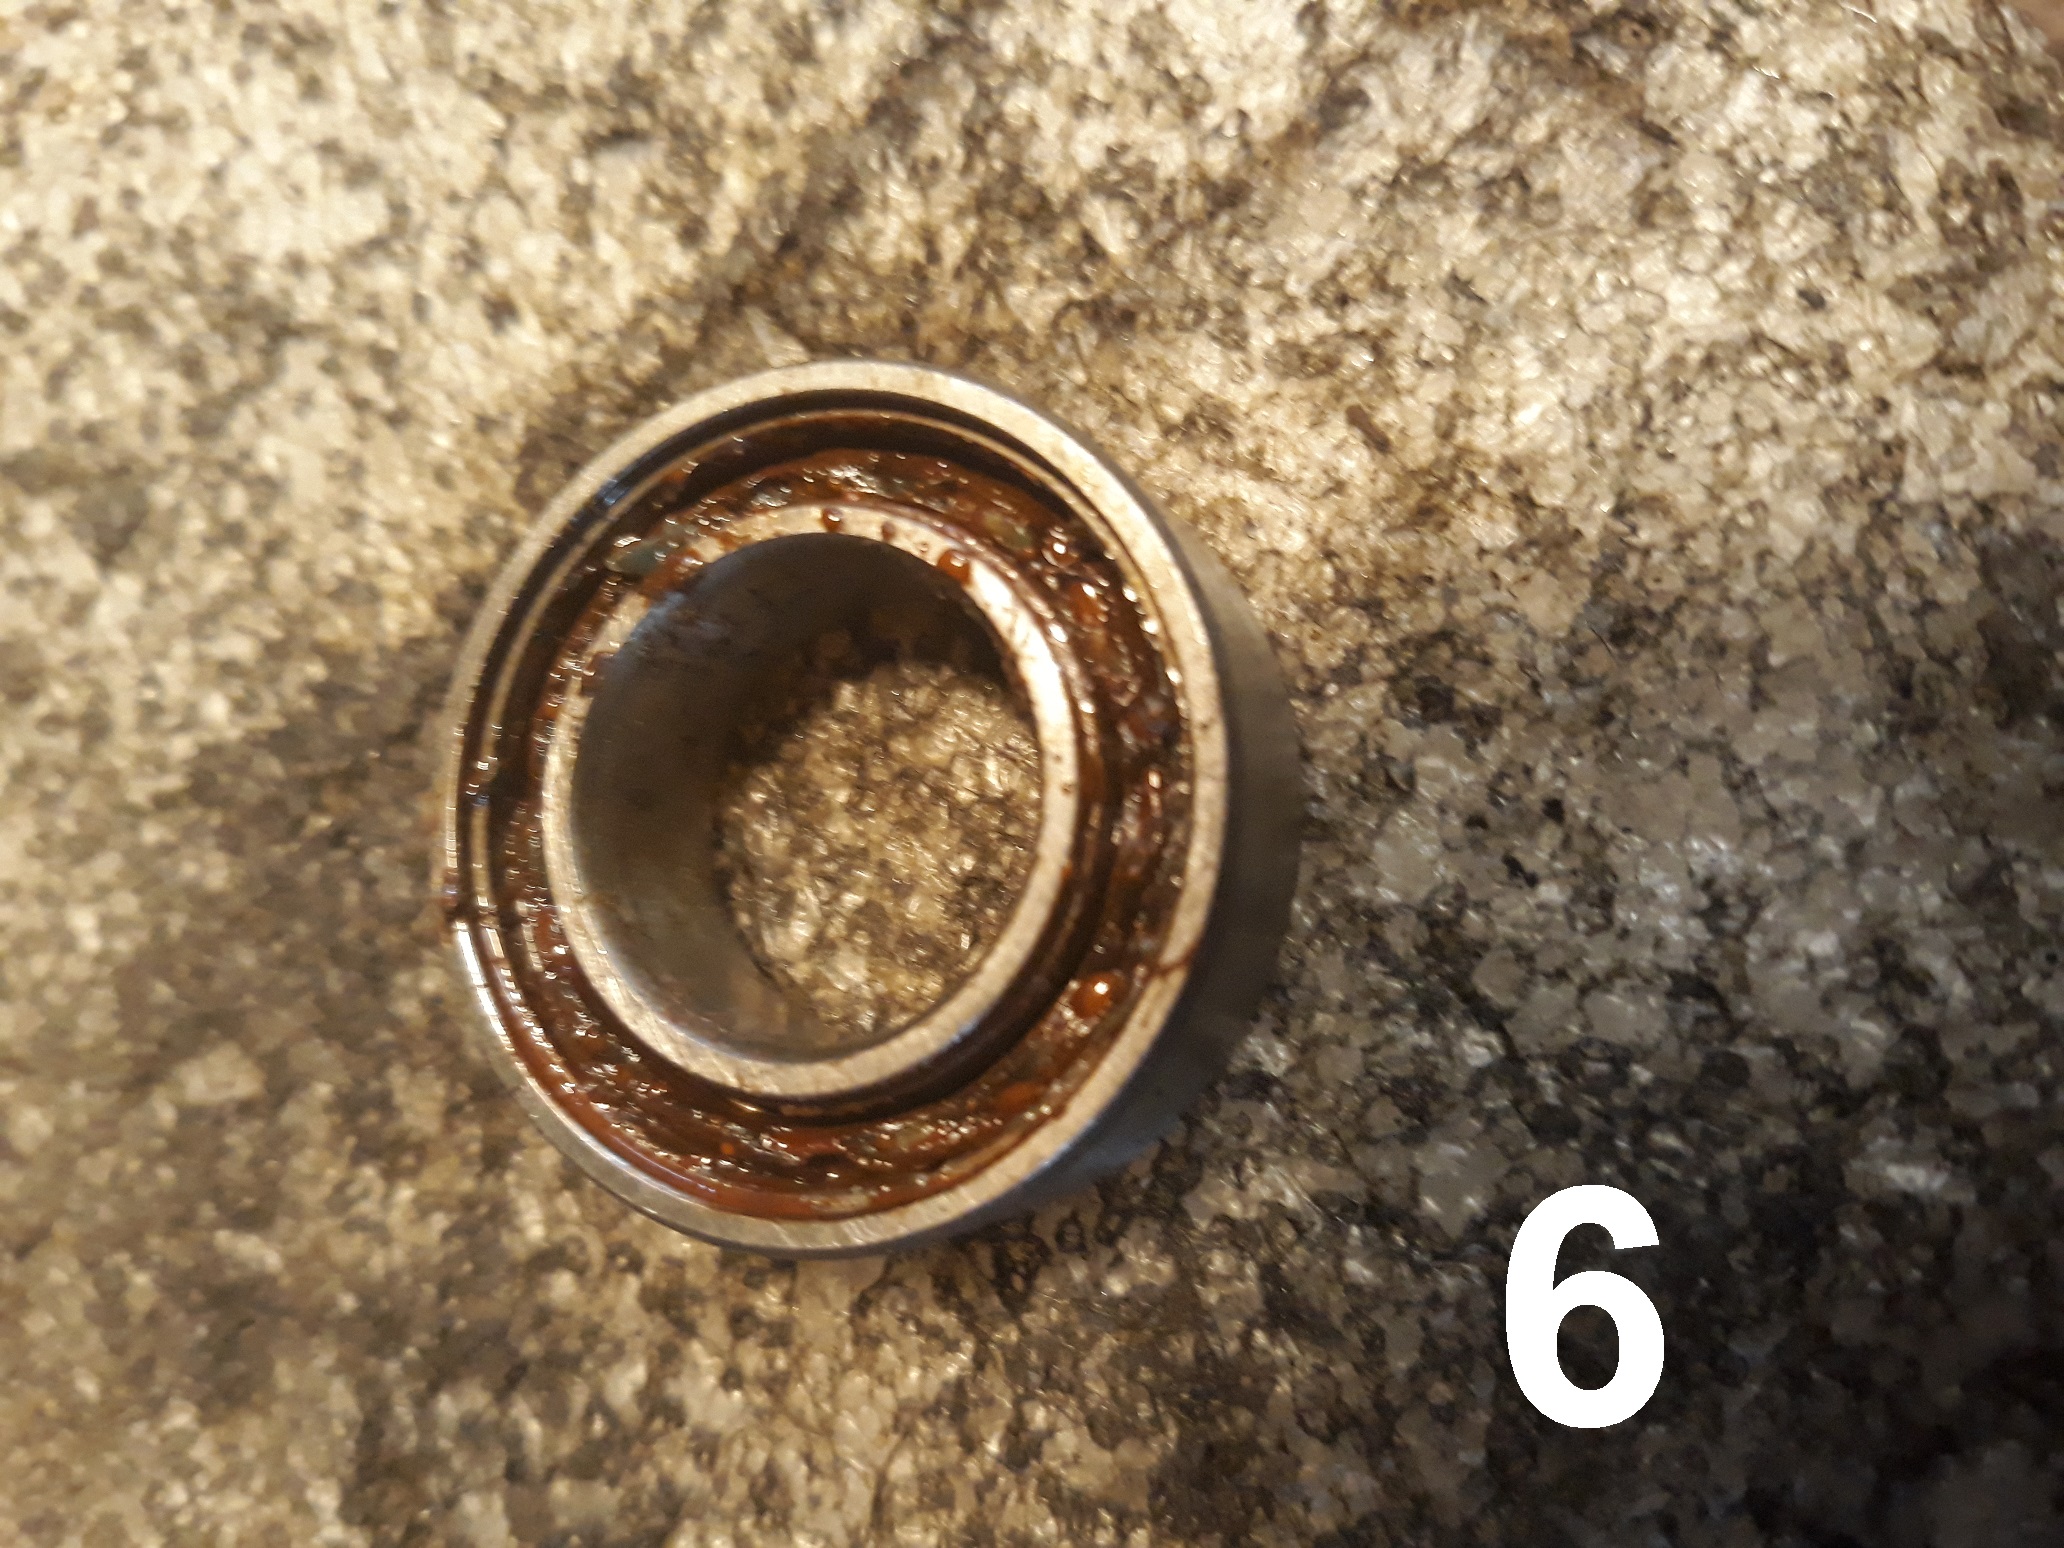
Photo 6 – What the bearings may look like when removed – instead of grease in there, it will be a substance that resembles rusty grinding paste. Throw bearings in bin.
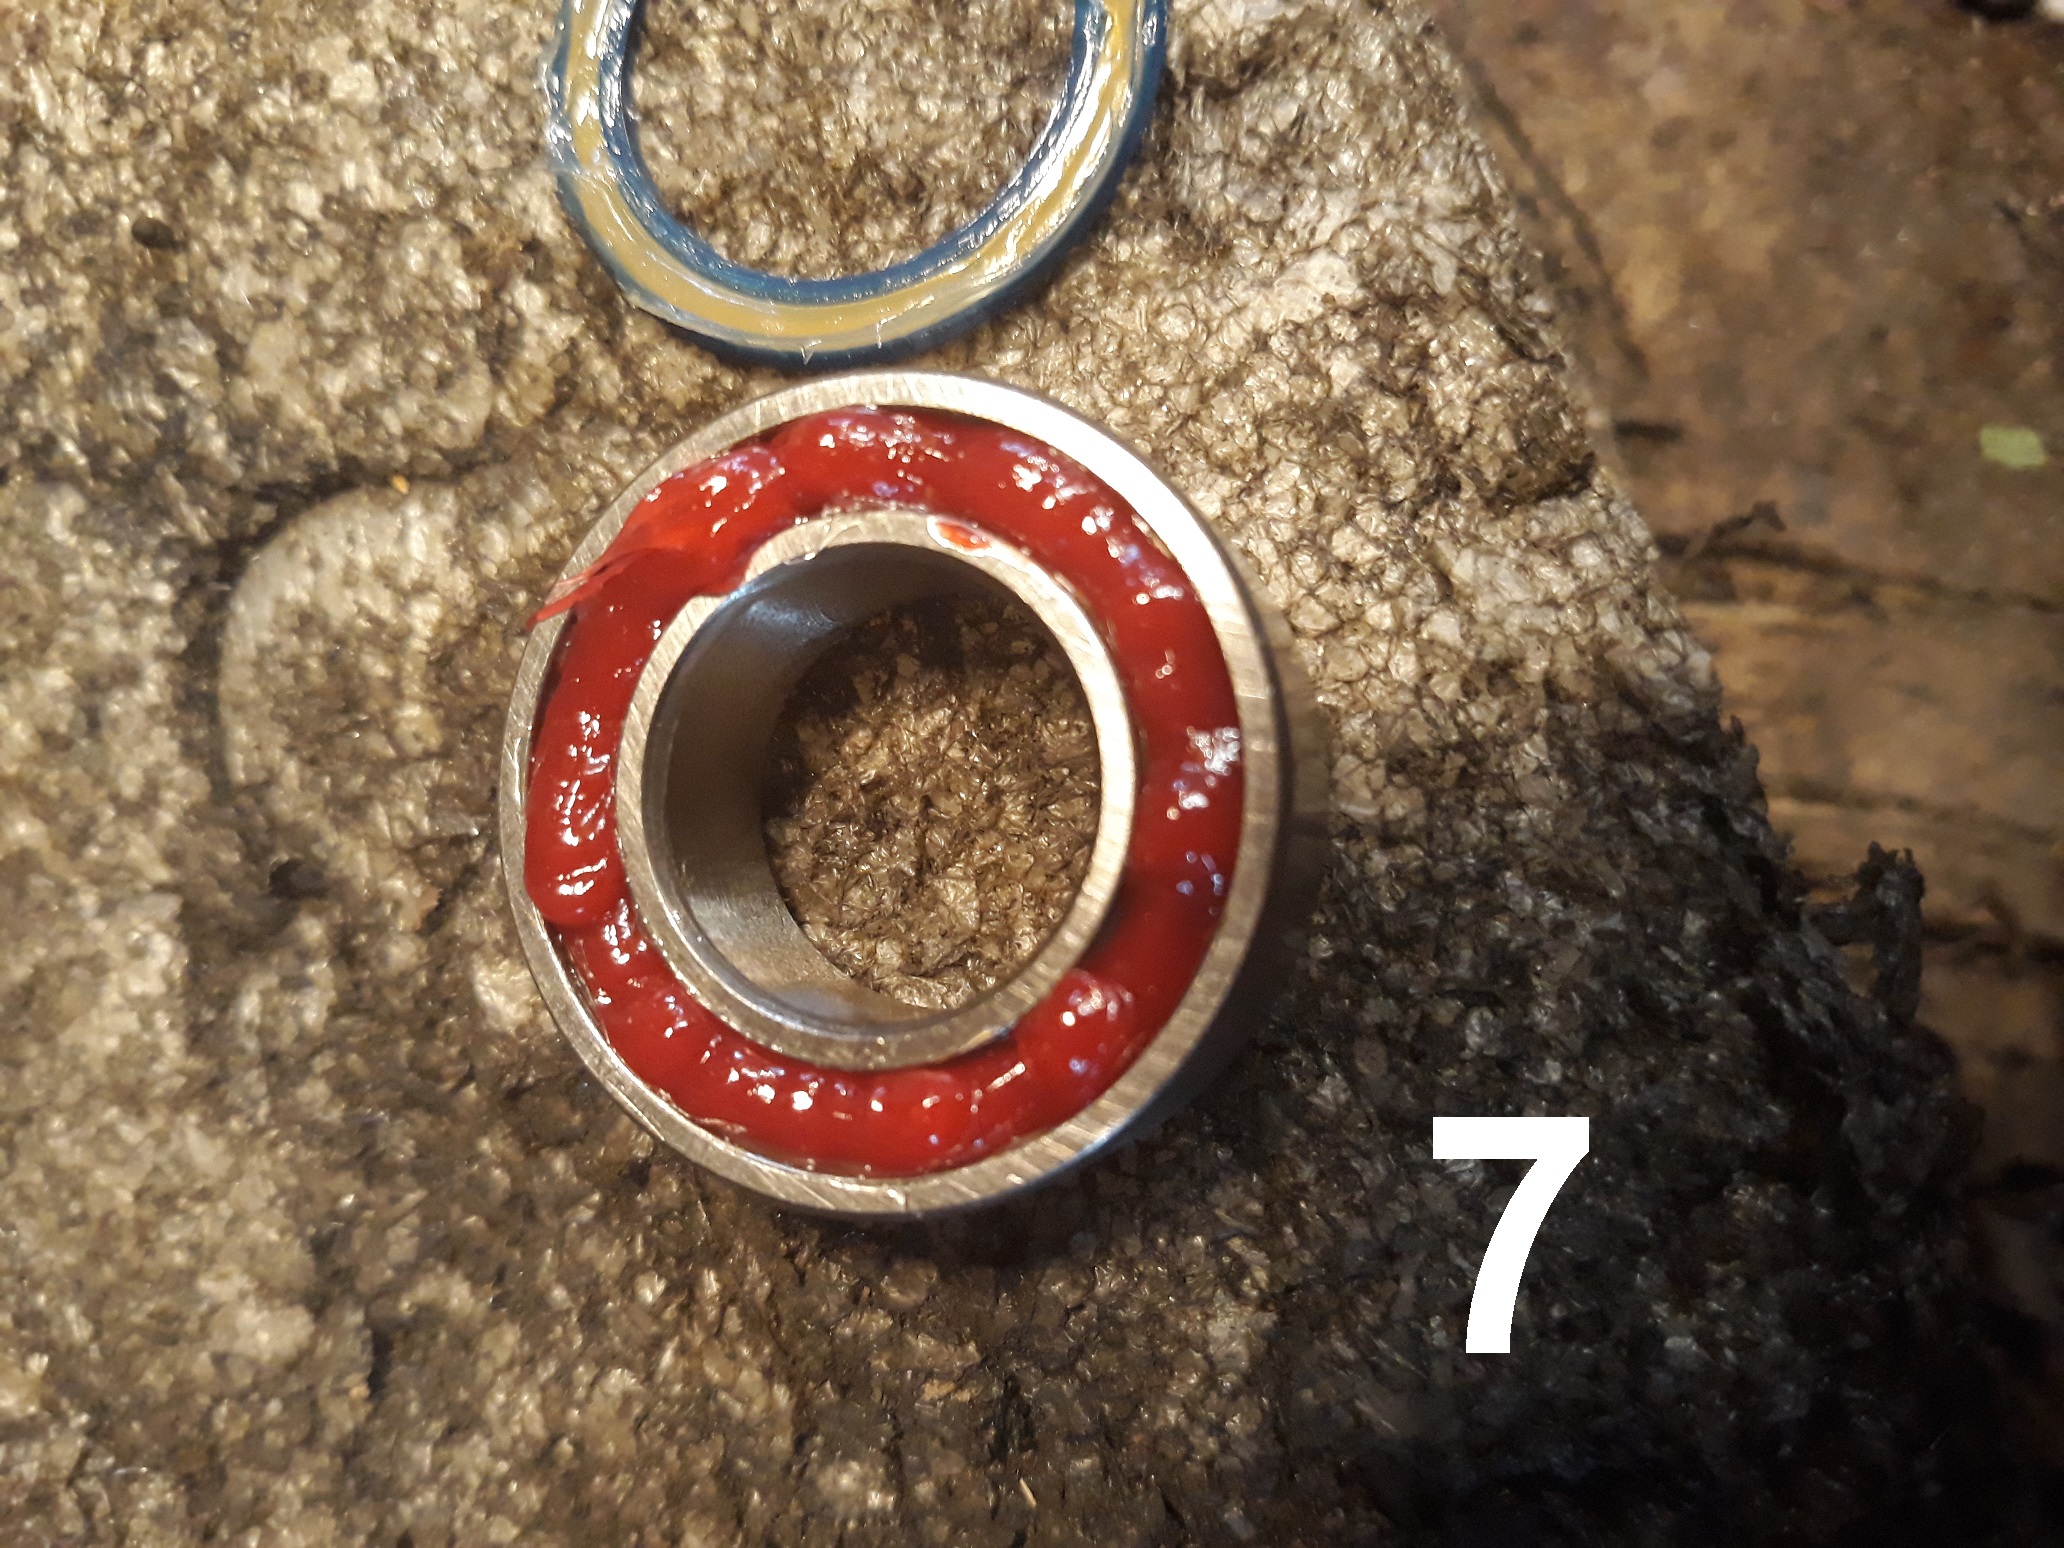
Photo 7 – New bearing. To me, they never seem to come with enough grease in, so I take the seals out and pack them well with TF2 Ultimate (any good quality grease will do). This will hopefully prolong the life of the new bearing.
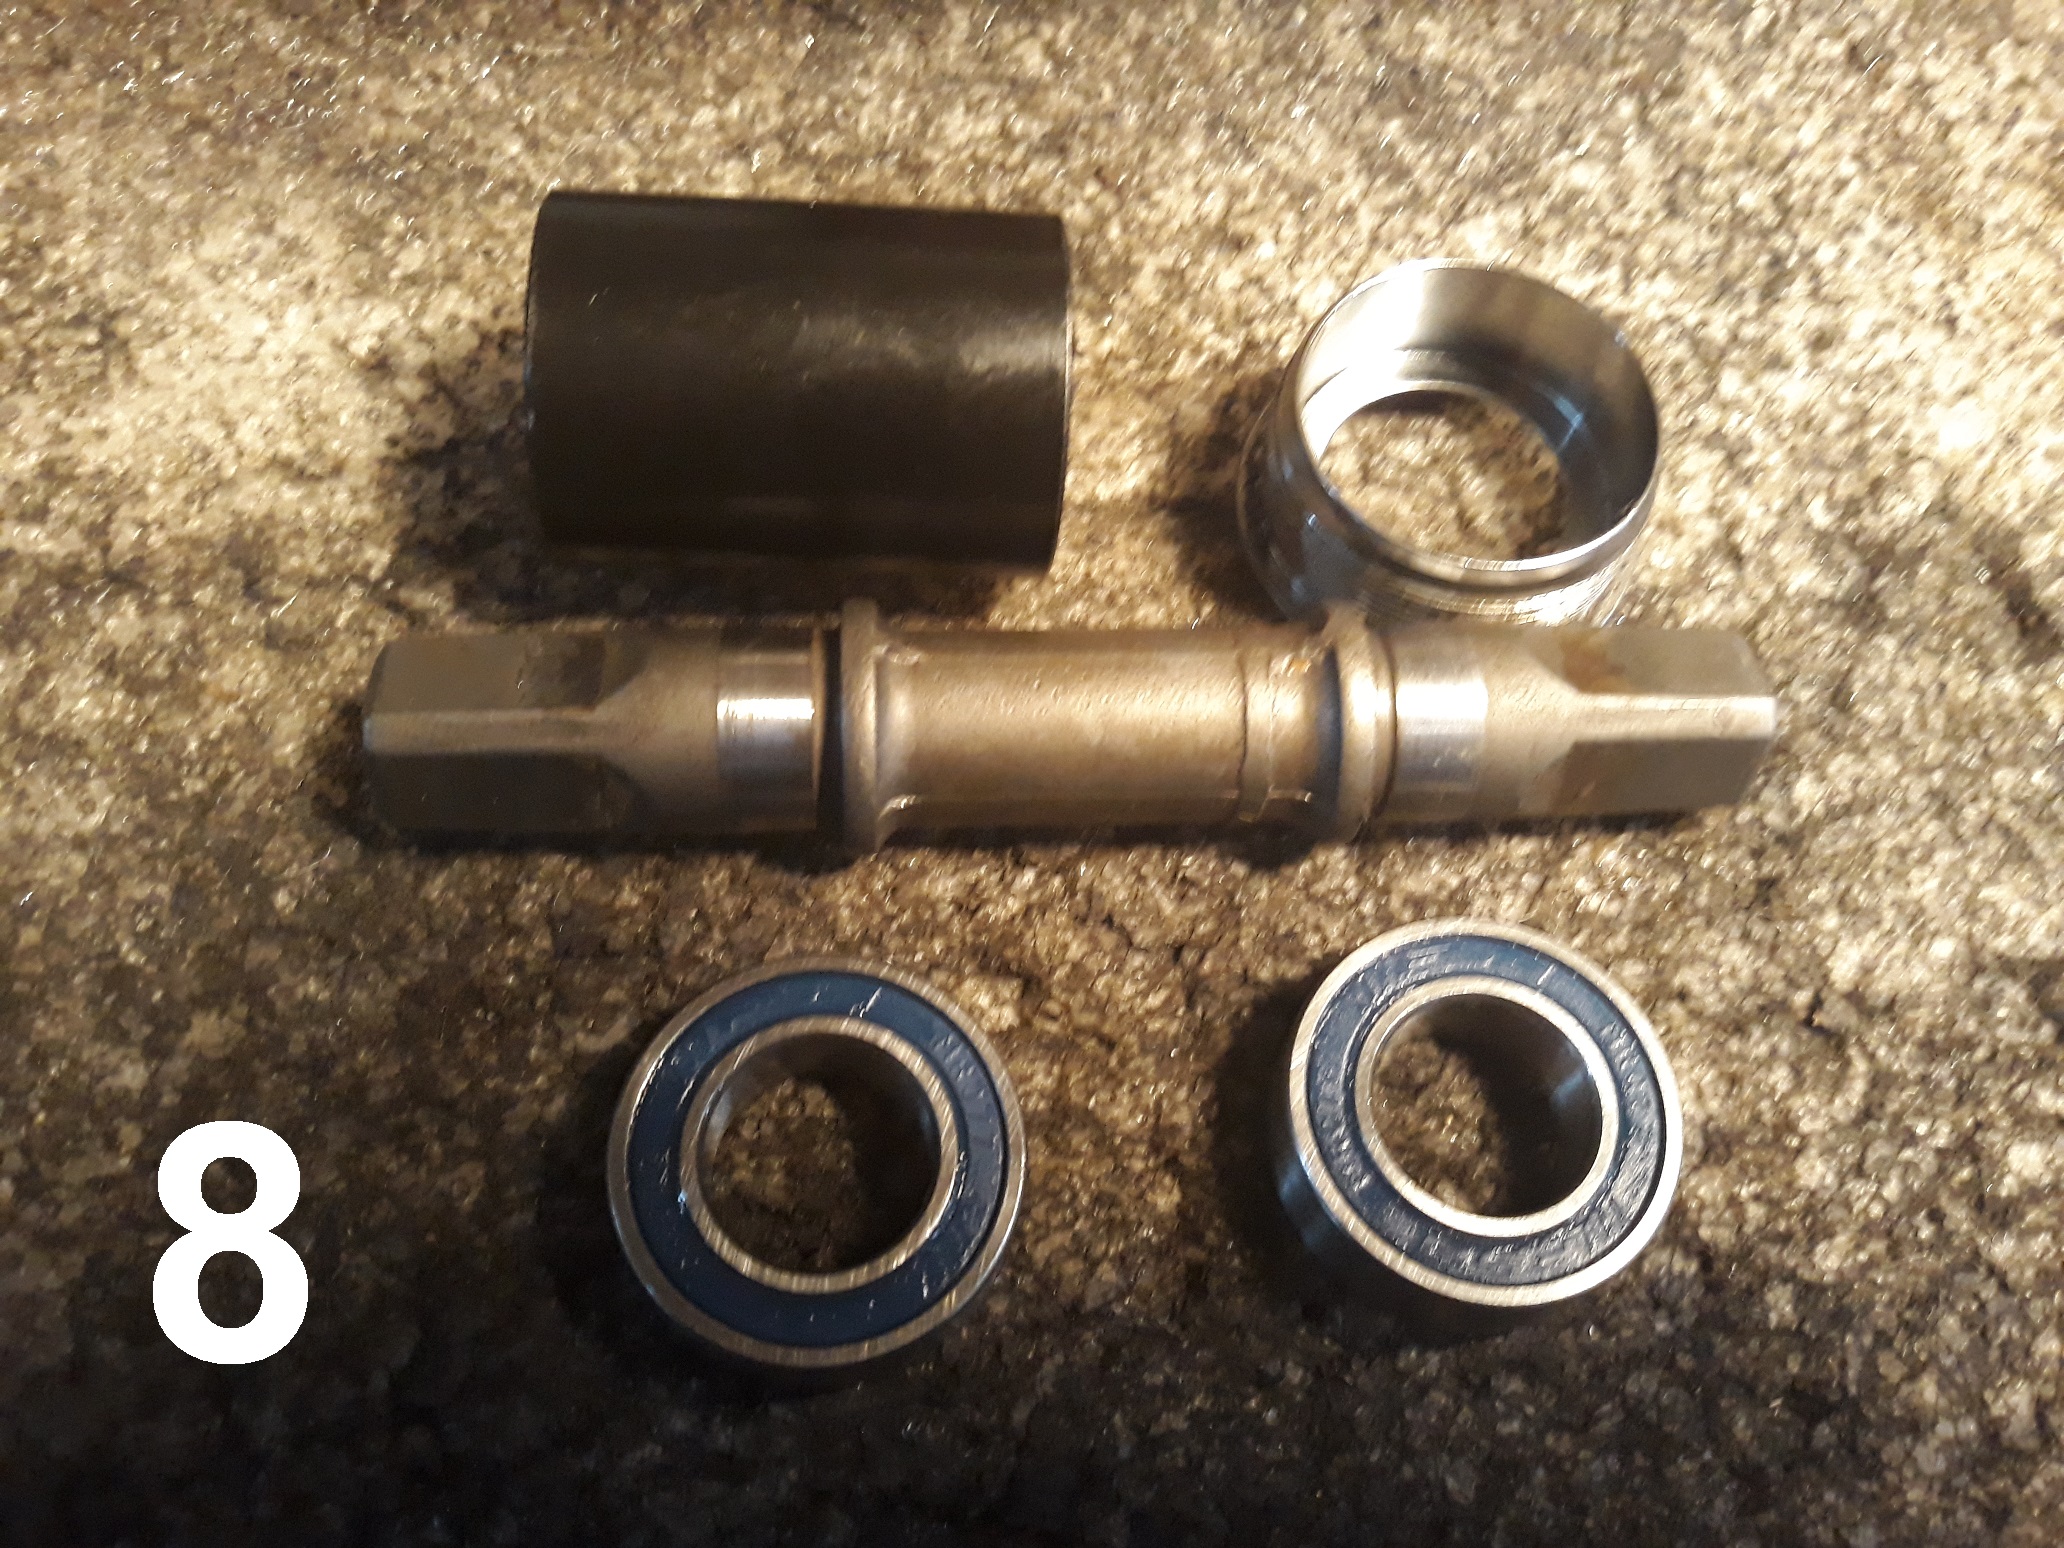
Photo 8 – The parts all cleaned up and ready for re-assembly. A light smear of grease on the spindle and/or inner/outer races of bearings will make this easier.
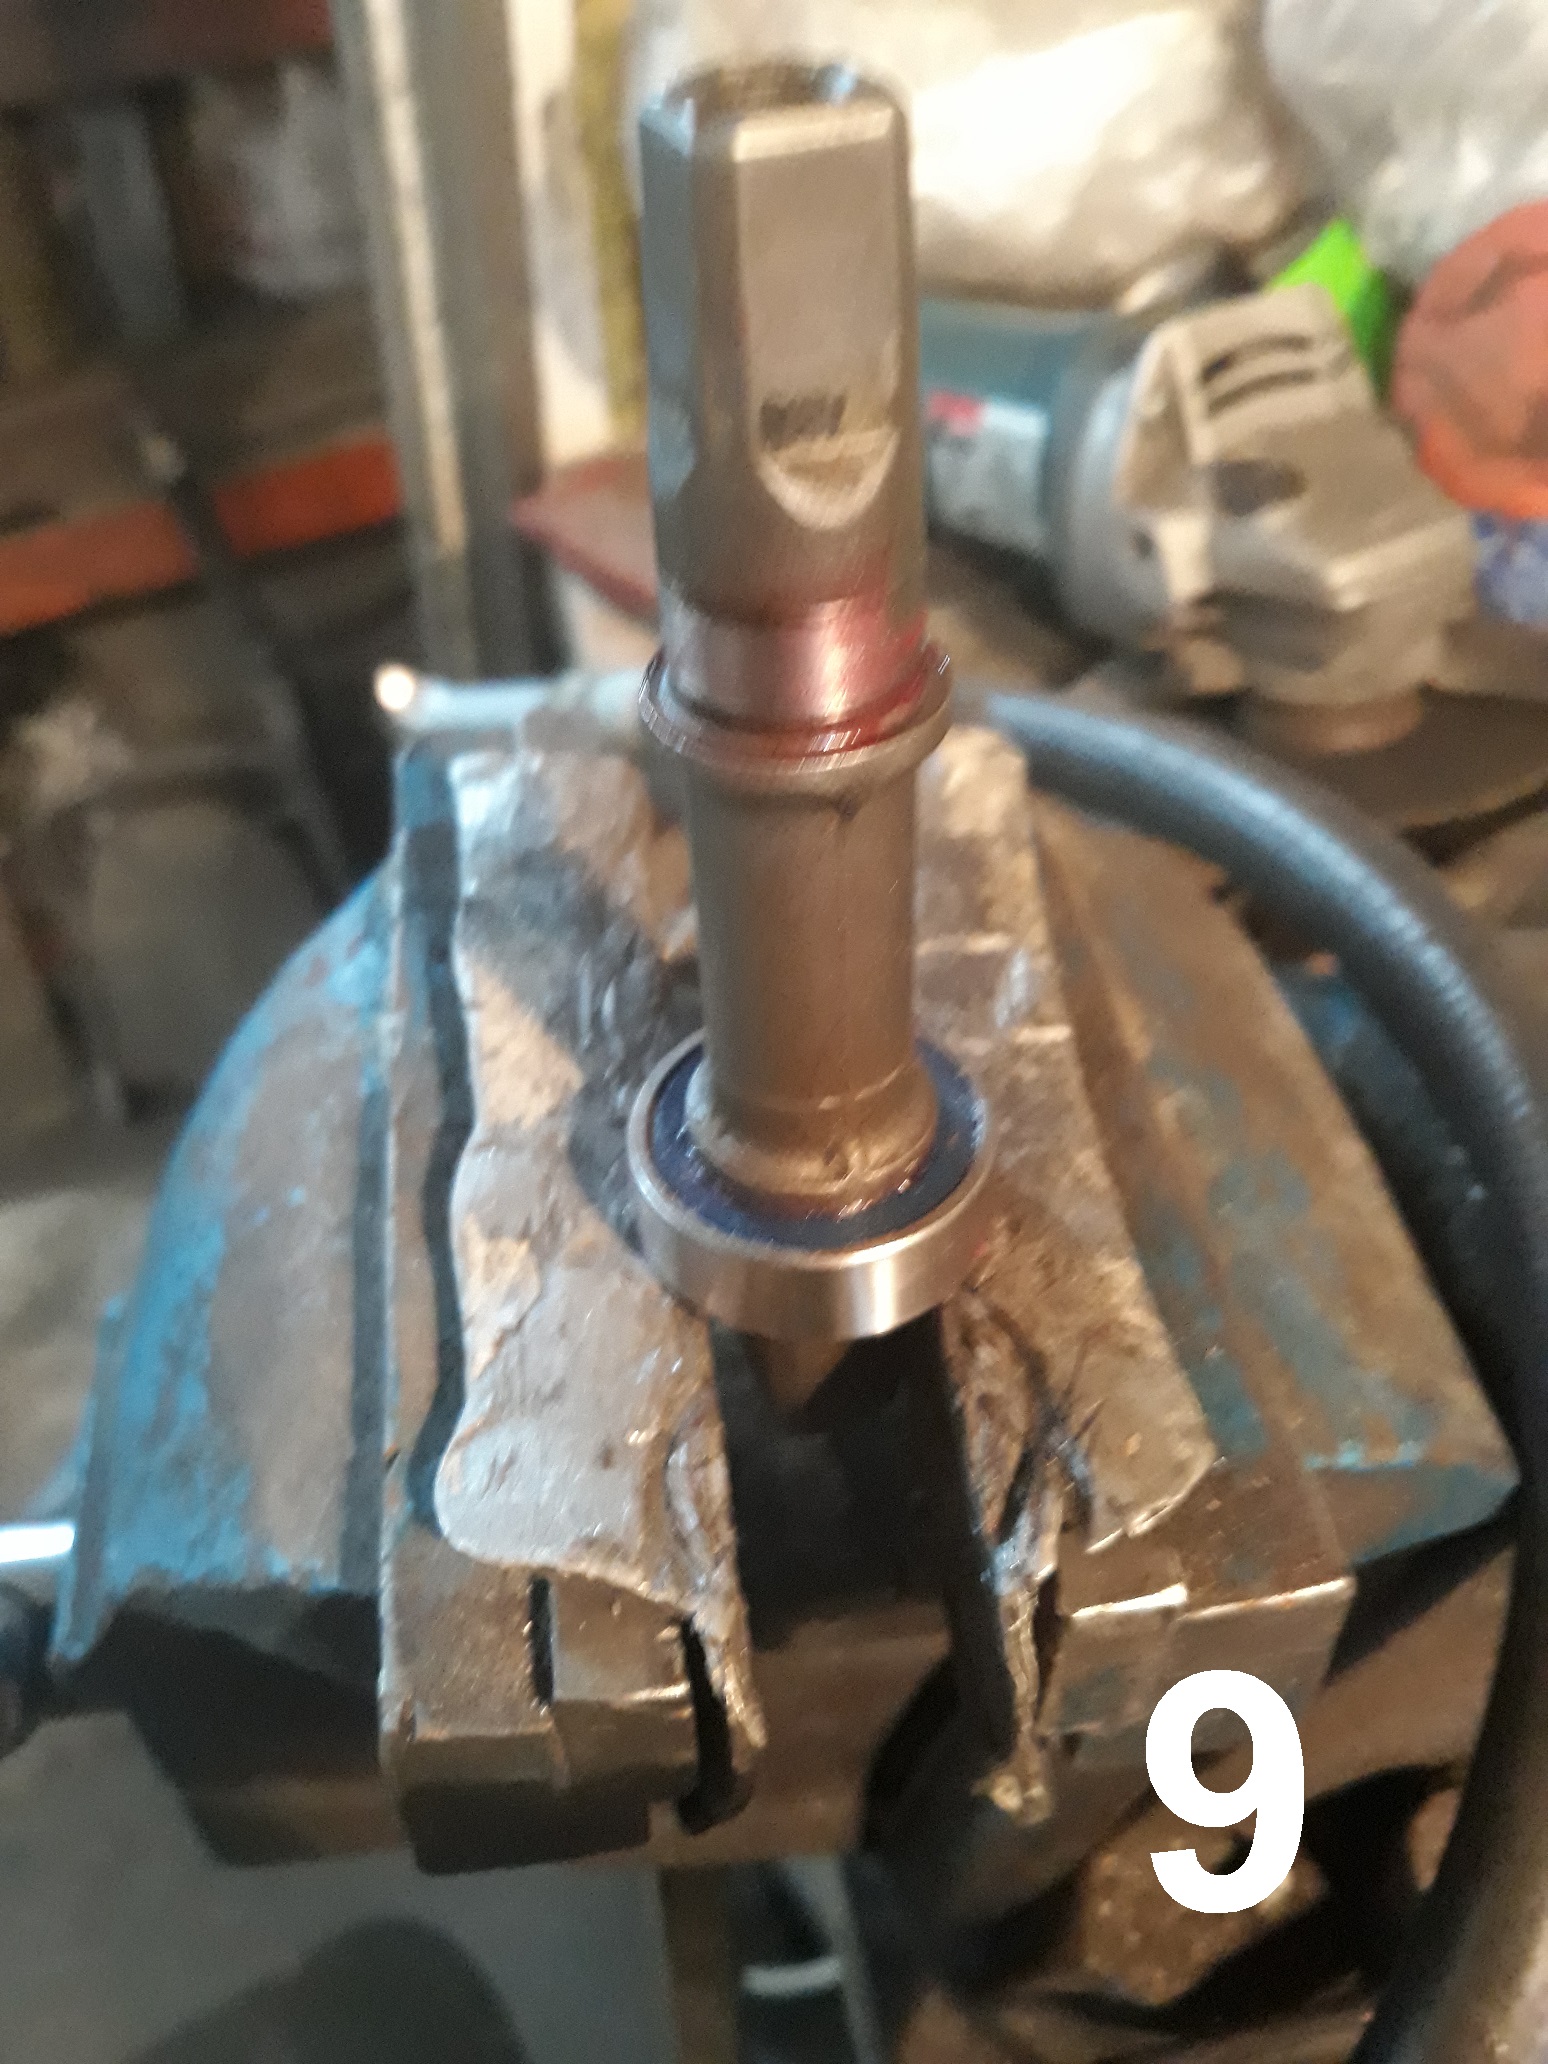
Photo 9 – Fit drive side bearing to spindle as per photo.
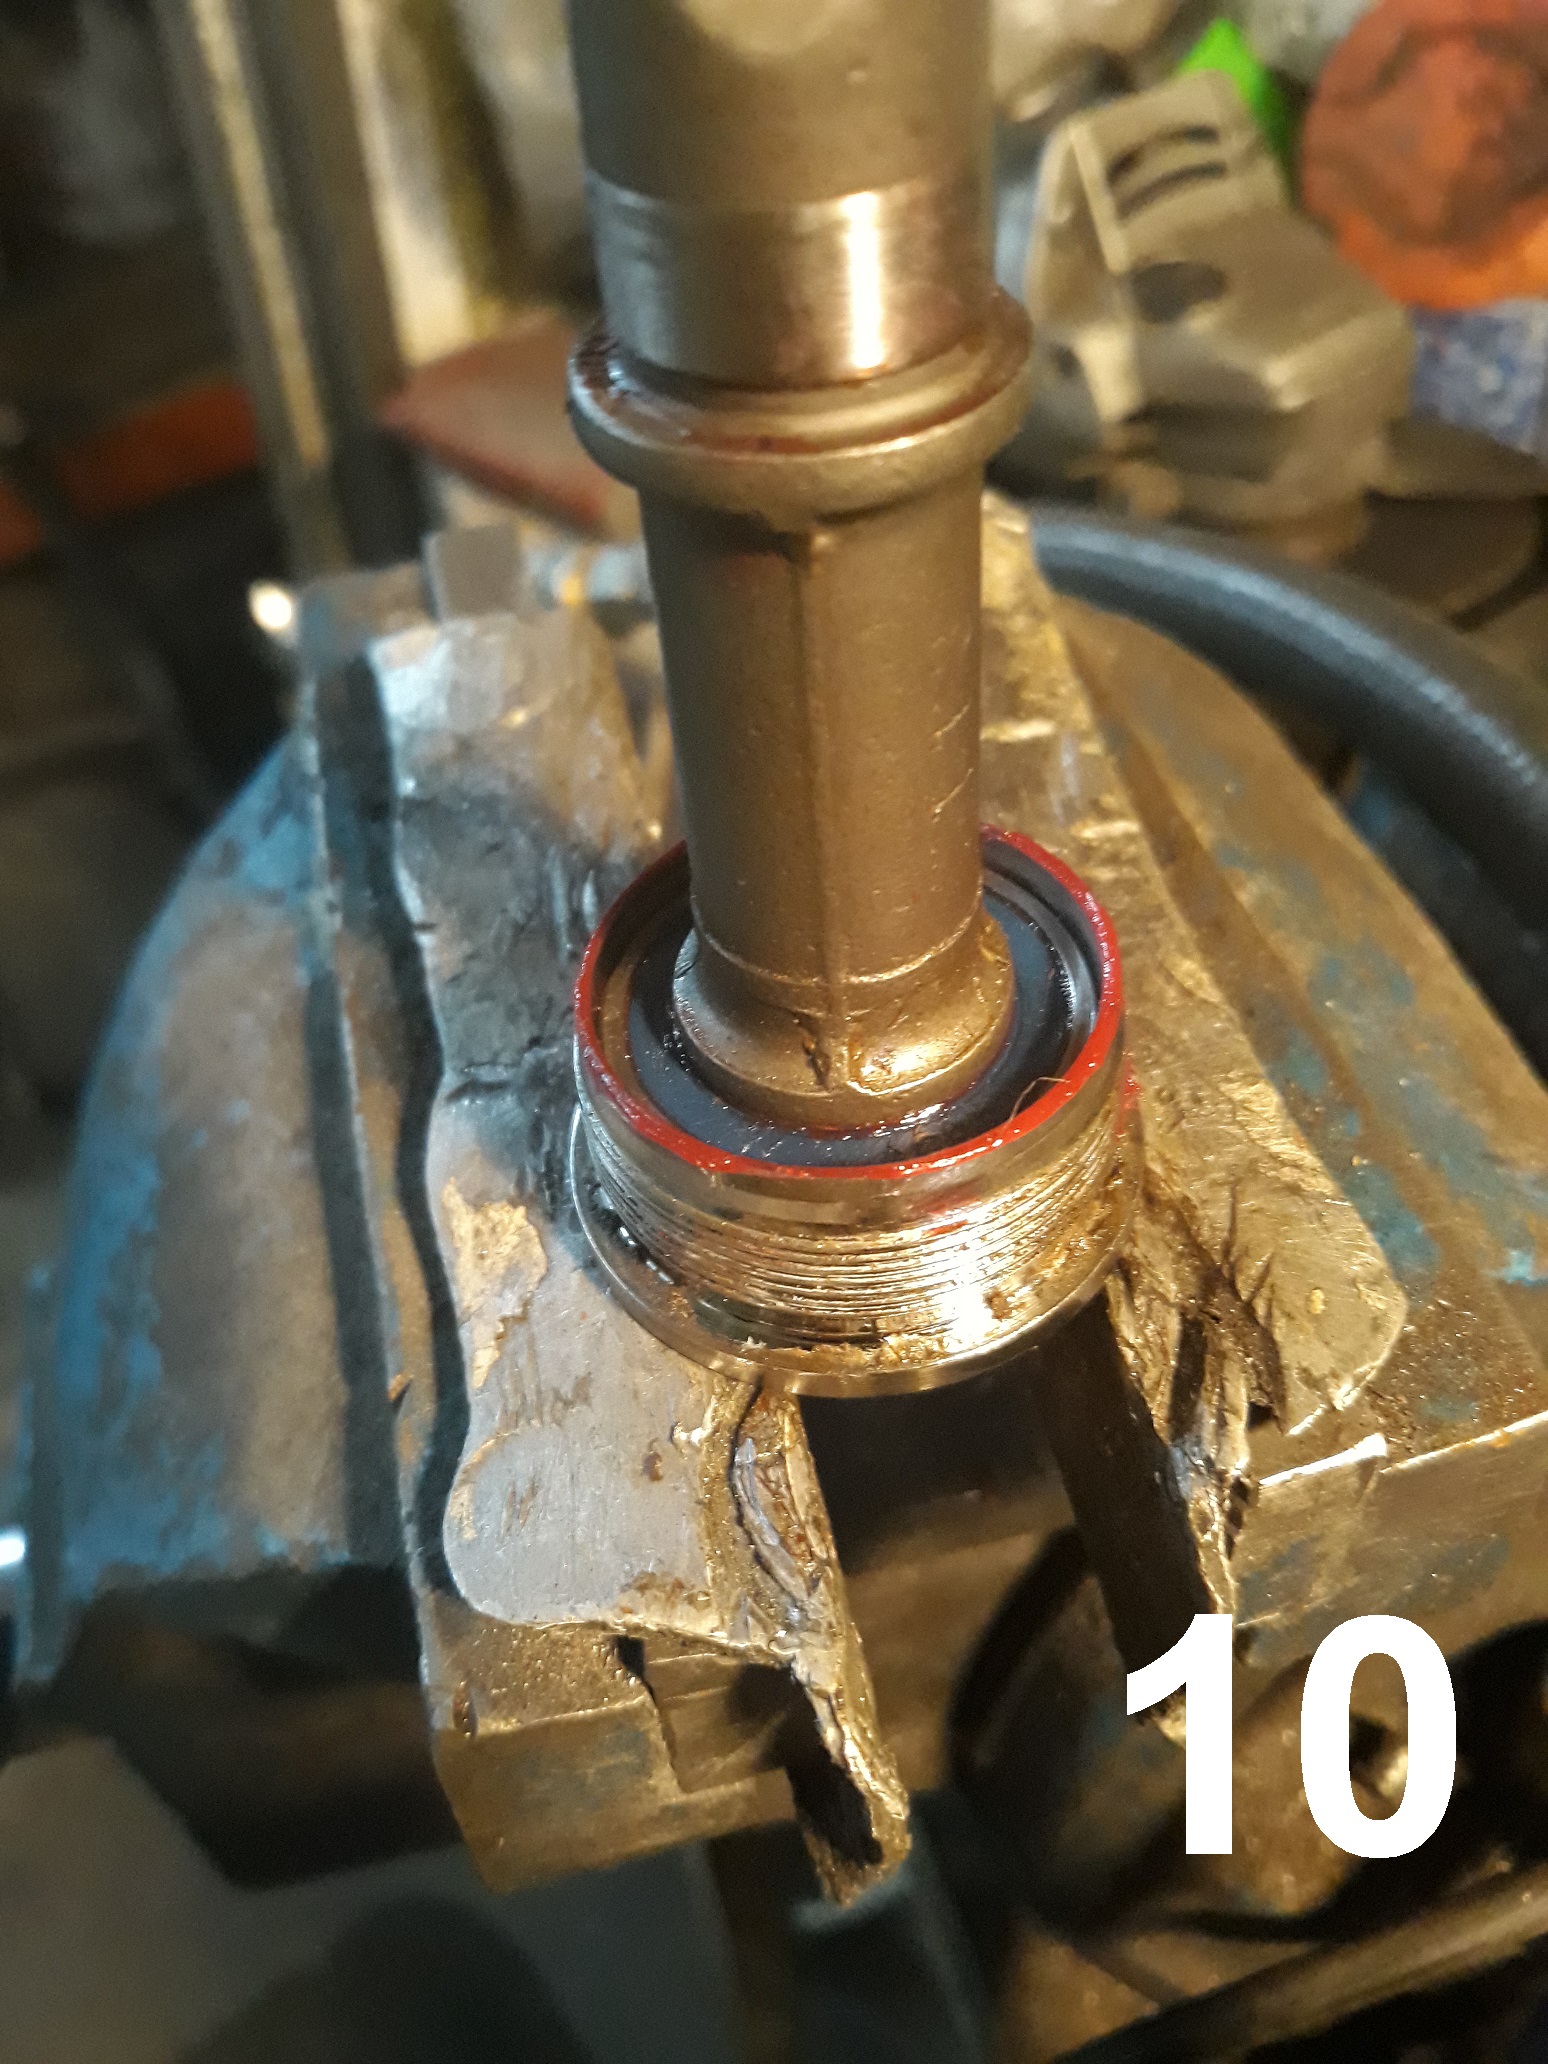
Photo 10 – Now drive the bearing into the drive side cup as per photo.
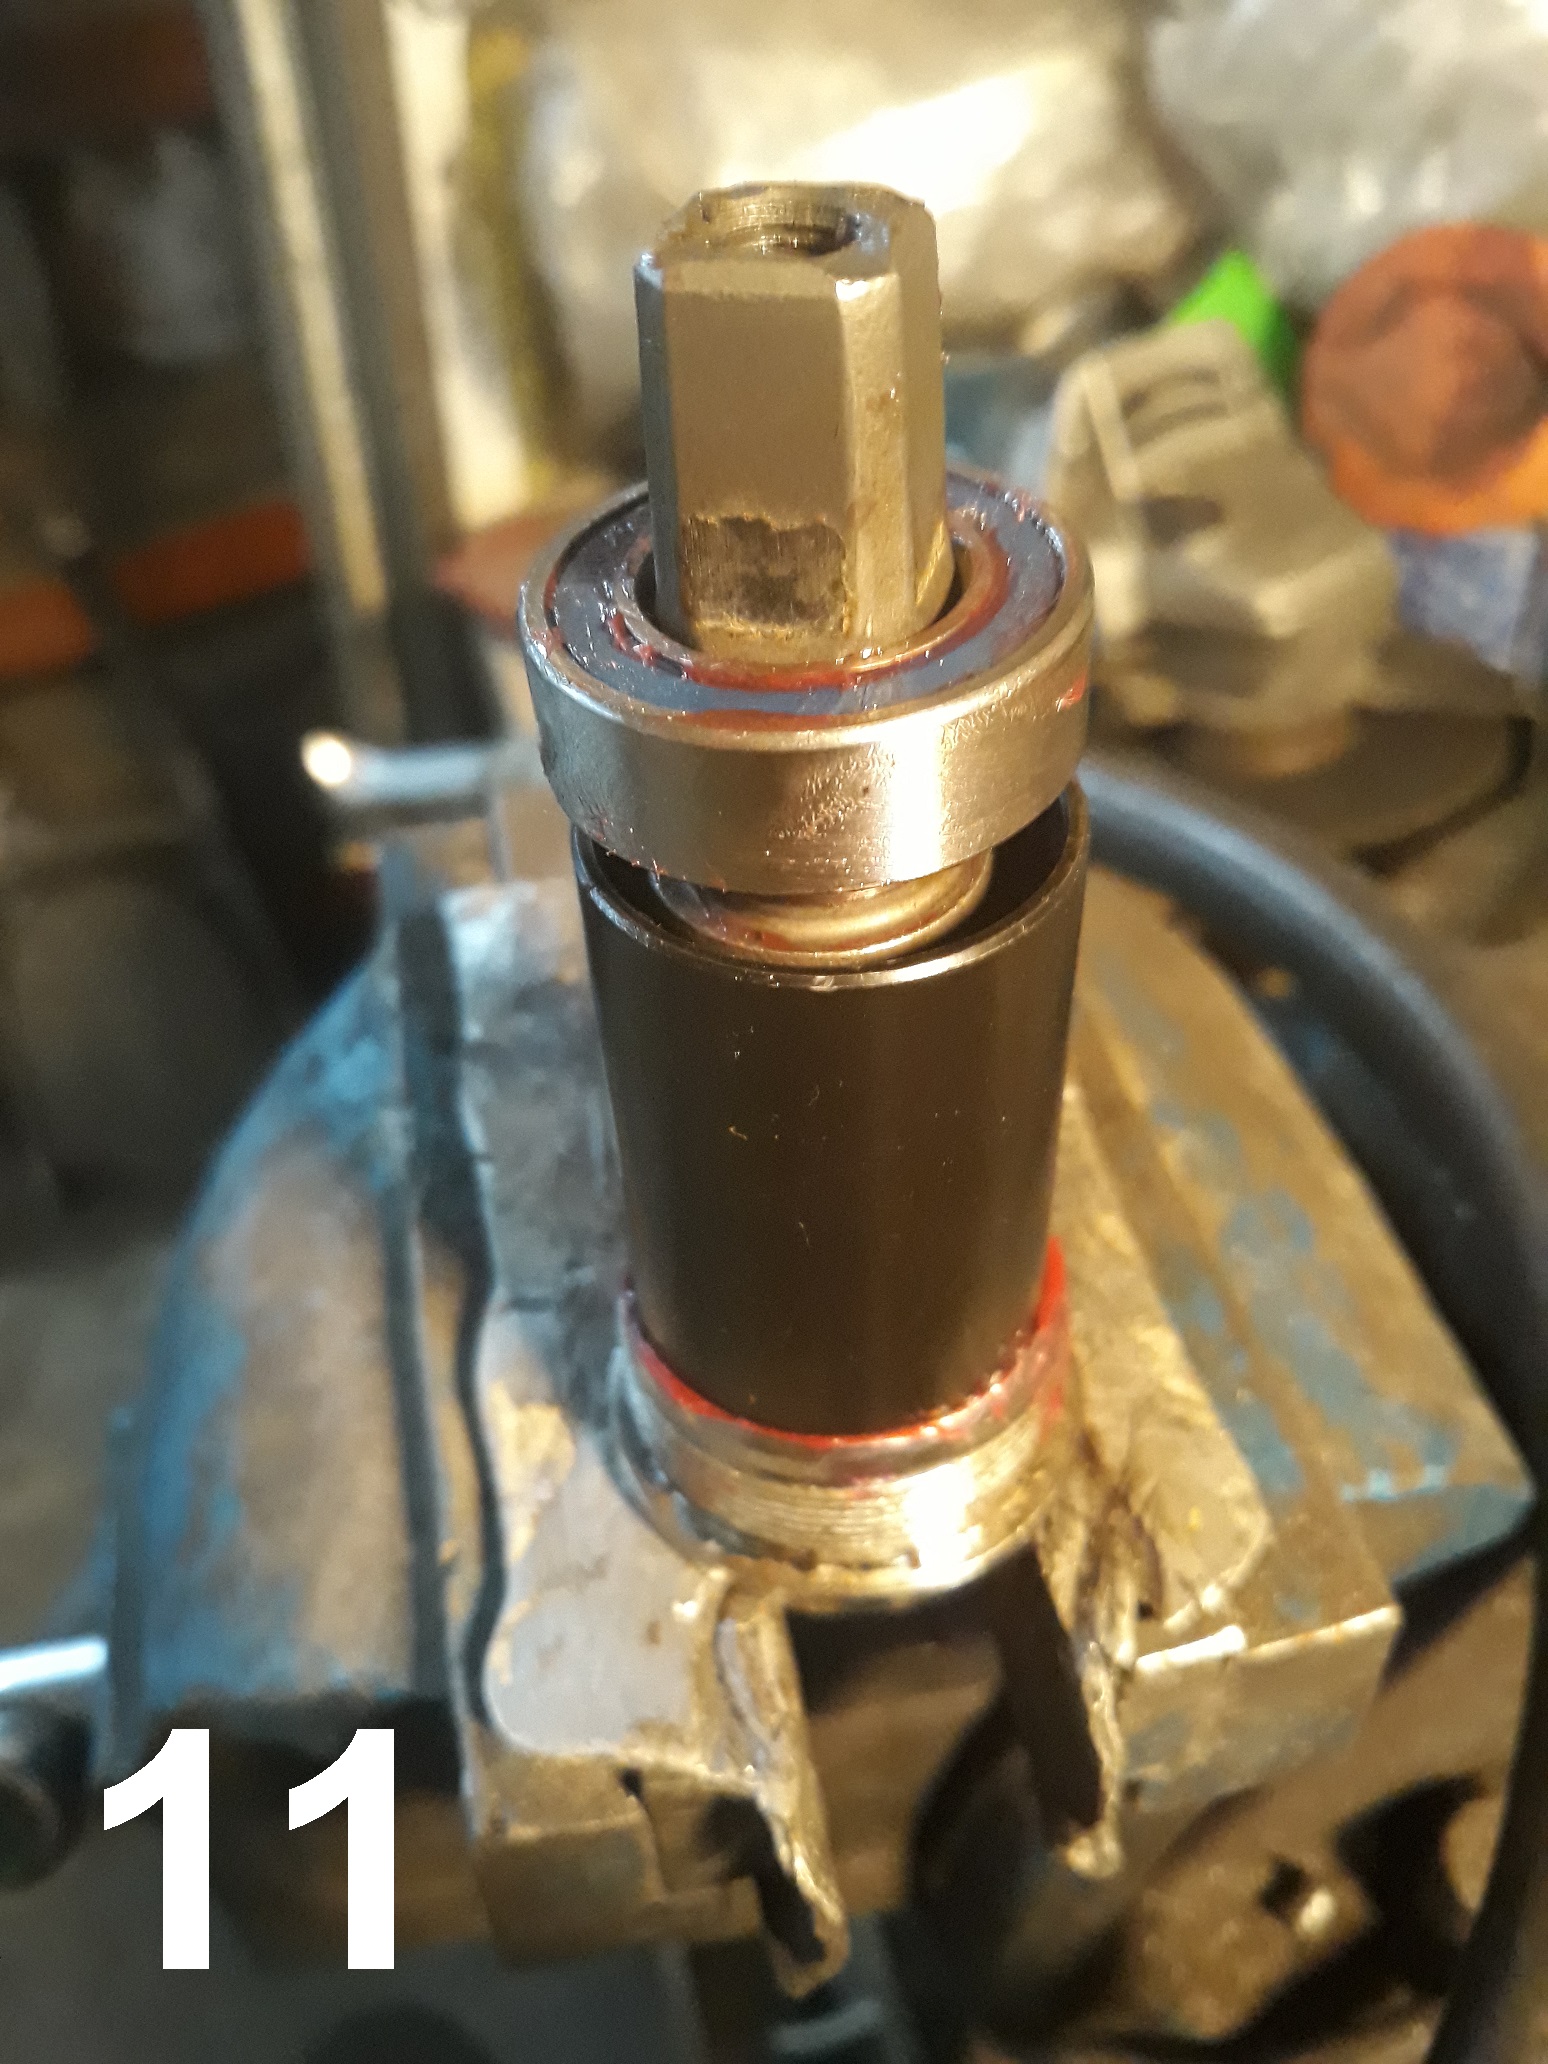
Photo 11 – Leave the spindle in the vice, put the centre tube on the same way it was before dismantling, then the non drive side bearing on the top. You can now use either a piece of steel tube or a deep socket that just fits over the spindle and bears on the inner race of the bearing, then tap down carefully. Note when doing this you have to make sure that the centre tube slots into the drive side cup, then the non drive side bearing should be seated against the shoulder on the spindle.
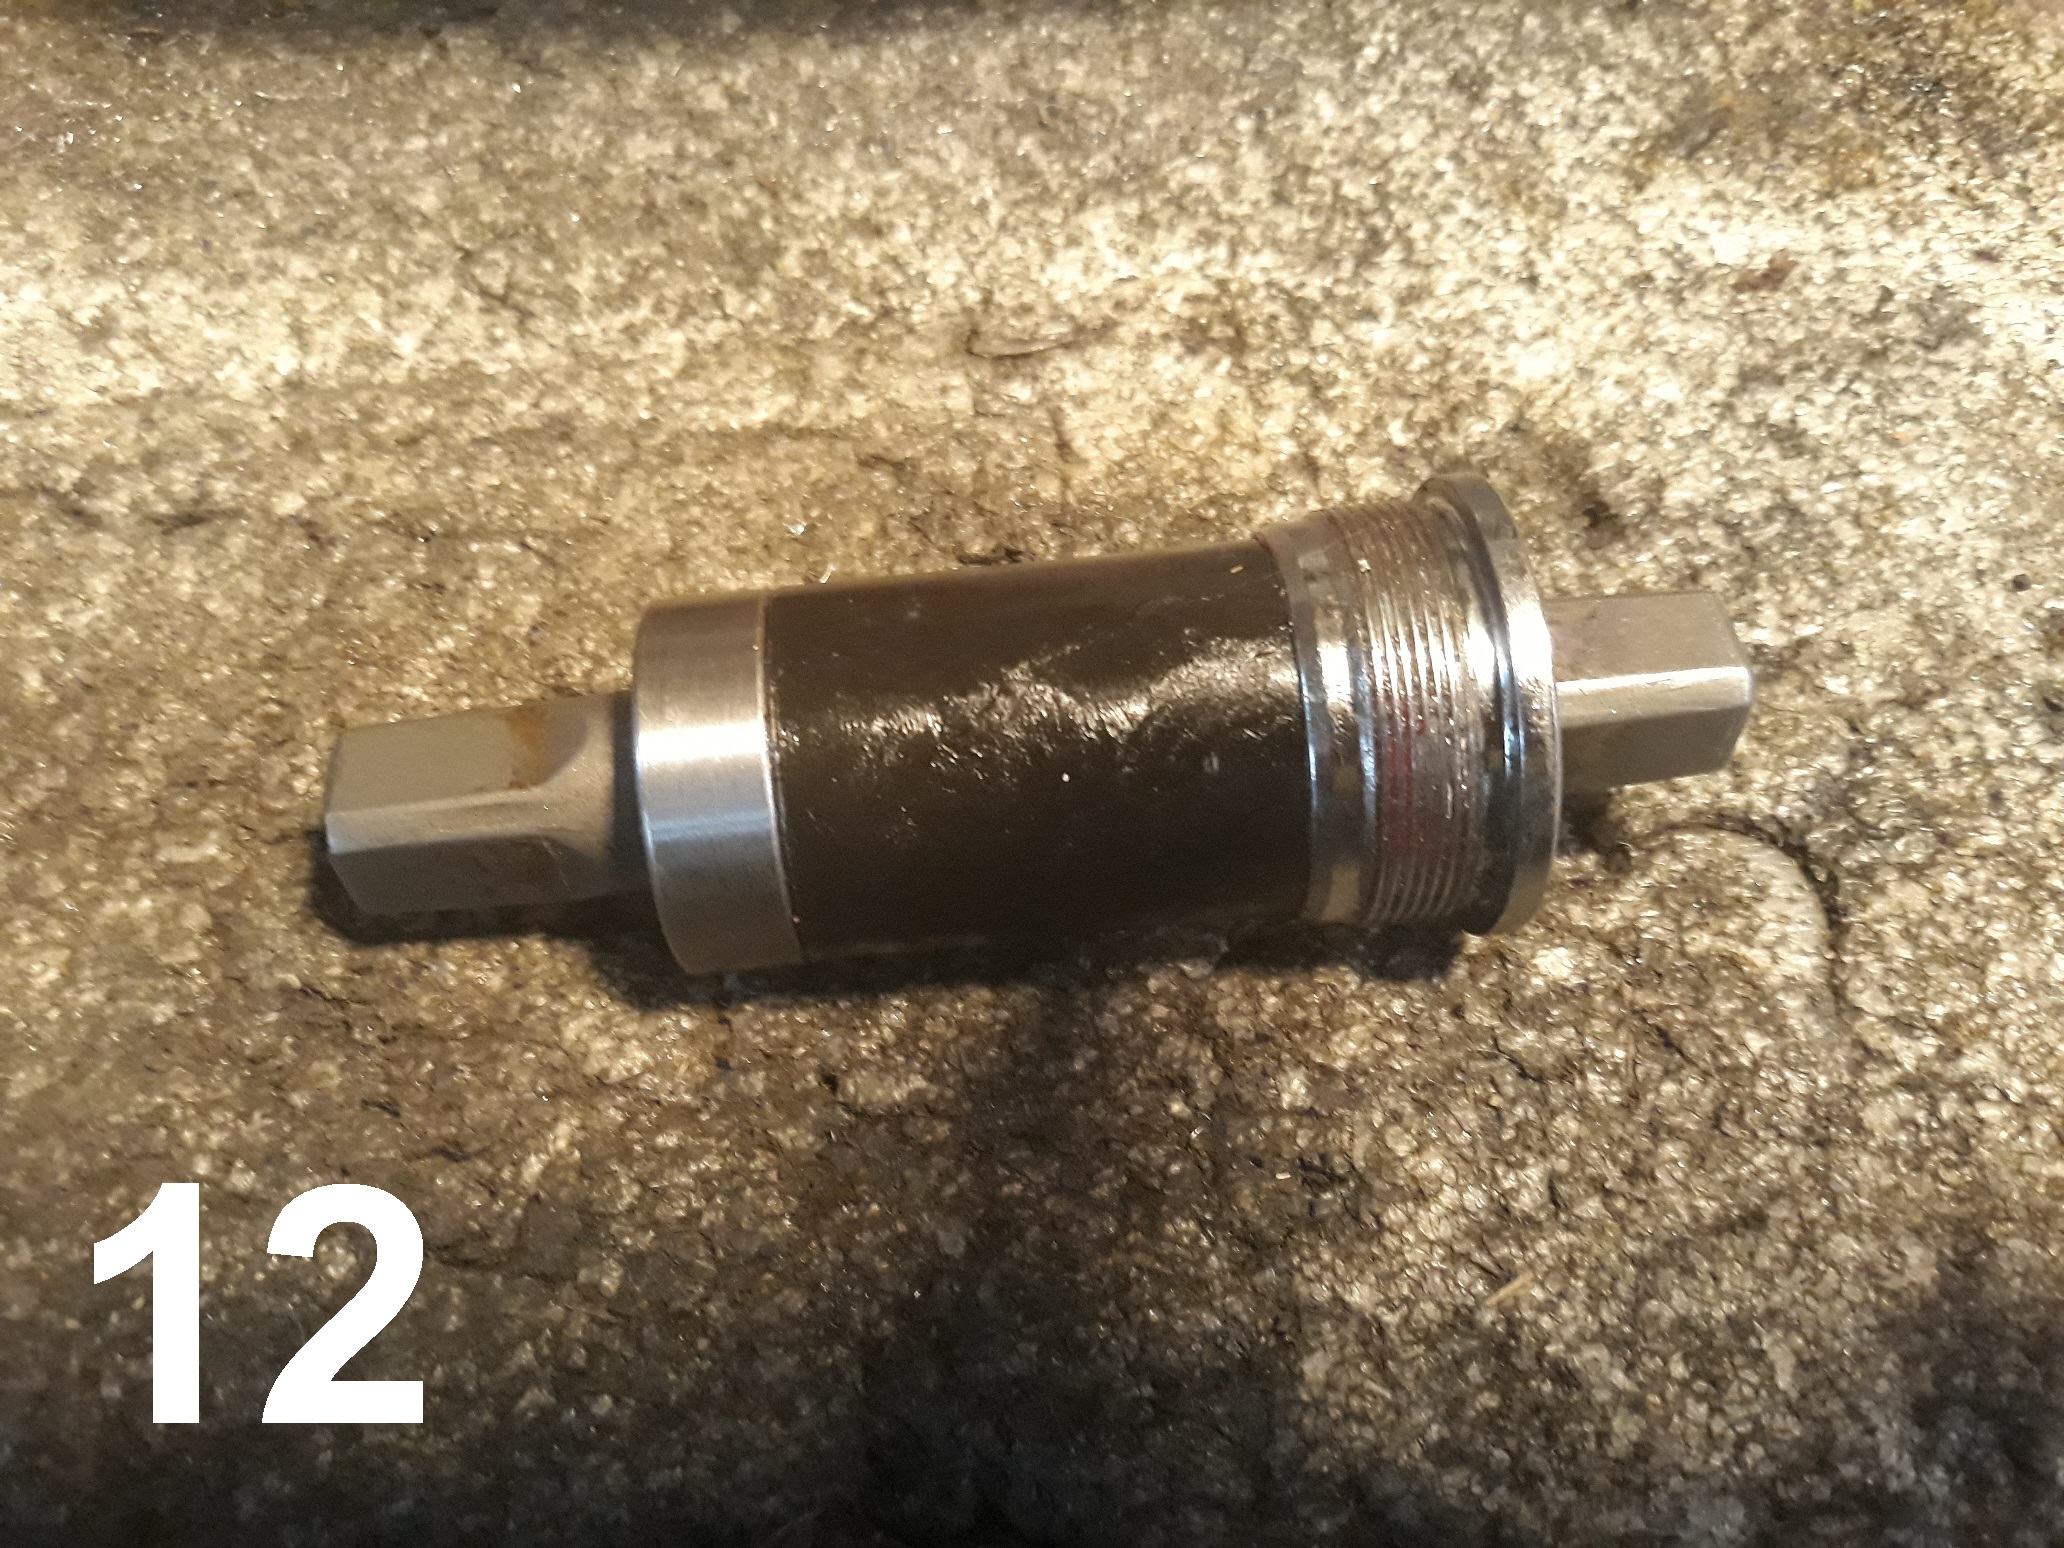
Photo 12 – This is the BB unit re-assembled. All you need to do now is fit it back on the bike (after you have cleaned any debris out of the BB shell and made sure threads are clean).
Job done, money saved. You’re welcome.
Leave a Reply
You must be logged in to post a comment.